Lab 3.1 – Configuring Engines
Configure Engines for Historization
The AppEngine
object will take care of the historization of all the attributes from the
objects that it hosts. Platforms are not hosted by an AppEngine, so they
require their own configuration for historization. In the next steps, you will enable
historization for the Engine and Platform templates and will historize some of
their performance counters.
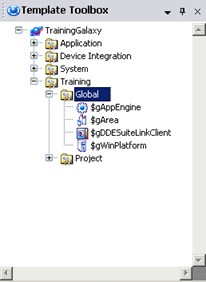
Step 1. In the ArchestrA IDE, in the Template
Toolbox, expand TrainingGalaxy\Training\Global
toolset.
Configure Engines for Historization
The AppEngine
object will take care of the historization of all the attributes from the
objects that it hosts. Platforms are not hosted by an AppEngine, so they
require their own configuration for historization. In the next steps, you will enable
historization for the Engine and Platform templates and will historize some of
their performance counters.
Step 1. In the ArchestrA IDE, in the Template
Toolbox, expand TrainingGalaxy\Training\Global
toolset.
Configure Engines for Historization
The AppEngine object will take care of the historization of all the attributes from the objects that it hosts. Platforms are not hosted by an AppEngine, so they require their own configuration for historization. In the next steps, you will enable historization for the Engine and Platform templates and will historize some of their performance counters.
Step 1. In the ArchestrA IDE, in the Template Toolbox, expand TrainingGalaxy\Training\Global
toolset.
Step 1.
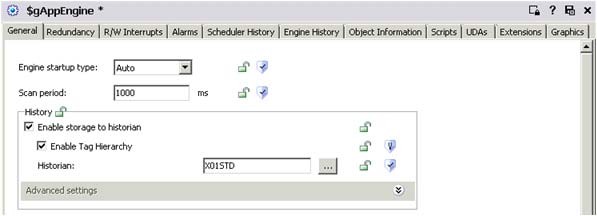
Double-click $gAppEngine to
open its configuration editor.
Step 2.
In the General tab, in the History area, check Enable storage to historian.
Step 3. In the Historian
field, enter the name of your Historian Server node.
Step 1.
Double-click $gAppEngine to
open its configuration editor.
Step 2.
In the General tab, in the History area, check Enable storage to historian.
Step 3. In the Historian
field, enter the name of your Historian Server node.
Step 1.
Double-click $gAppEngine to
open its configuration editor.
Step 2.
In the General tab, in the History area, check Enable storage to historian.
Step 3. In the Historian
field, enter the name of your Historian Server node.
Step 1.
Double-click $gAppEngine to
open its configuration editor.
Step 2.
In the General tab, in the History area, check Enable storage to historian.
Step 3. In the Historian
field, enter the name of your Historian Server node.
Step 1.
Double-click $gAppEngine to
open its configuration editor.
Step 2.
In the General tab, in the History area, check Enable storage to historian.
Step 3. In the Historian
field, enter the name of your Historian Server node.
Step 1. Double-click $gAppEngine to open its configuration editor.
Step 2. In the General tab, in the History area, check Enable storage to historian.
Step 3. In the Historian field, enter the name of your Historian Server node.
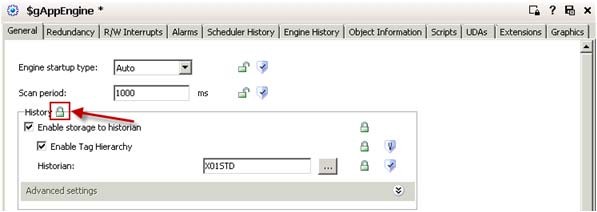
Step 5. Leave the default settings and click the History area lock icon.
Step 6. Click the Scheduler History tab.
Step 5. Leave the default settings and click the History area lock icon.
Step 6. Click the Scheduler History tab.
Step 5. Leave the default settings and click the History area lock icon.
Step 6. Click the Scheduler History tab.
Step 5. Leave the default settings and click the History area lock icon.
Step 6. Click the Scheduler History tab.
Step 5. Leave the default settings and click the History area lock icon.
Step 6. Click the Scheduler History tab.
Step 5. Leave the default settings and click the History area lock icon.
Step 6. Click the Scheduler History tab.

Step 7. Scroll down and check Historize
scan overrun count group, leaving the default settings.
Step 7. Scroll down and check Historize
scan overrun count group, leaving the default settings.
Step 7. Scroll down and check Historize
scan overrun count group, leaving the default settings.
Step 7. Scroll down and check Historize
scan overrun count group, leaving the default settings.
Step 7. Scroll down and check Historize
scan overrun count group, leaving the default settings.
Step 7. Scroll down and check Historize scan overrun count group, leaving the default settings.
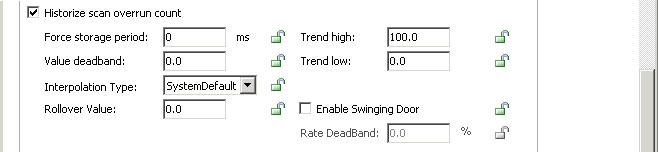
Step 8. Click all the lock icons in the group.
Step 8. Click all the lock icons in the group.
Step 8. Click all the lock icons in the group.
Step 8. Click all the lock icons in the group.
Step 8. Click all the lock icons in the group.
Step 8. Click all the lock icons in the group.

Step 10. In the Comment field, enter a comment and then click OK.
Step 11. Click Close.
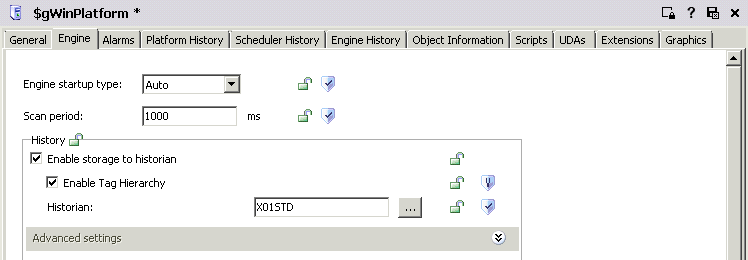
Step 12. In the Template Toolbox, under the Global toolset, double-click $gWinPlatform to open its editor.
Step 13. Select the Engine tab.
Step 14. In the History area, check Enable storage to historian.
Step 15. In the Historian field, enter the name of your Historian Server node.
Step 16. Leave the default settings and click the History area lock icon.
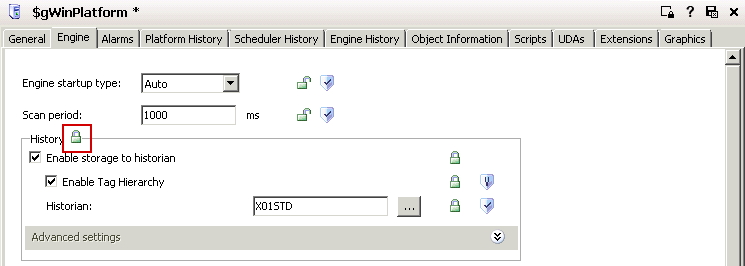
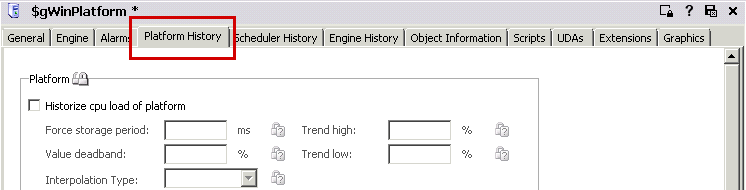
Step 17. Click the Platform History tab.
Step 17. Click the Platform History tab.
Step 17. Click the Platform History tab.
Step 17. Click the Platform History tab.
Step 17. Click the Platform History tab.
Step 17. Click the Platform History tab.
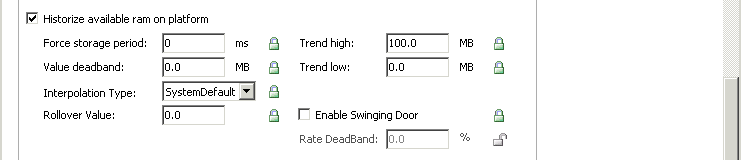
Step 18. Scroll down and check Historize available ram on platform
group, leaving the default
settings.
Step 18. Scroll down and check Historize available ram on platform
group, leaving the default
settings.
Step 18. Scroll down and check Historize available ram on platform
group, leaving the default
settings.
Step 18. Scroll down and check Historize available ram on platform
group, leaving the default
settings.
Step 18. Scroll down and check Historize available ram on platform
group, leaving the default
settings.
Step 18. Scroll down and check Historize available ram on platform group, leaving the default settings.
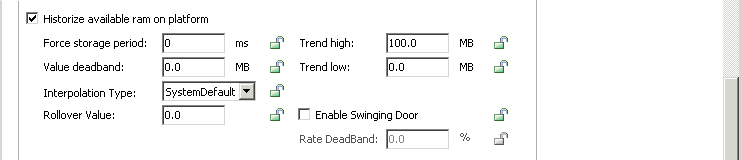
Step 19. Click all the lock icons in the group.
Step 19. Click all the lock icons in the group.
Step 19. Click all the lock icons in the group.
Step 19. Click all the lock icons in the group.
Step 19. Click all the lock icons in the group.
Step 19. Click all the lock icons in the group.
Step 20. Save and check in the object.
Step 20. Save and check in the object.
Step 20. Save and check in the object.
Step 20. Save and check in the object.
Step 20. Save and check in the object.
Step 20. Save and check in the object.