Lab 1 – Creating the Galaxy
Step 1. Open the ArchestrA IDE (Start | All Programs | Wonderware | ArchestrA IDE).
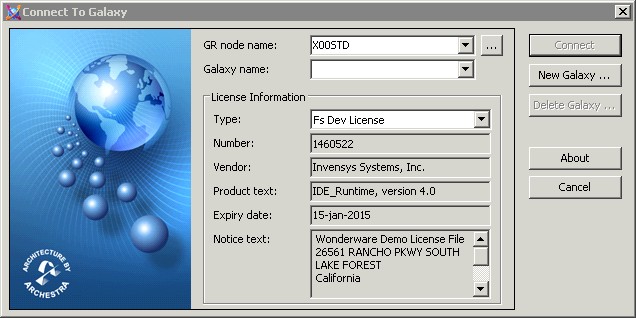
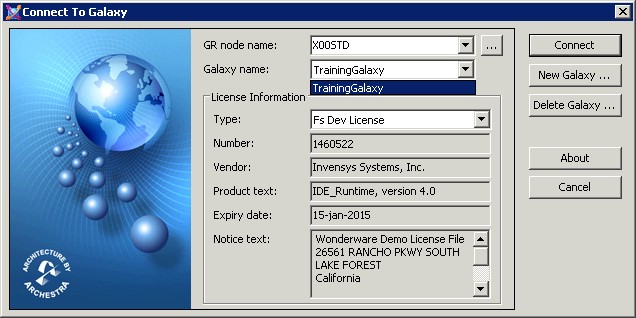
The Connect to Galaxy dialog box appears with the local node name displayed in the GR node name drop-down list. In this example, X00STD is the local computer name.
Step 1. Open the ArchestrA IDE (Start | All Programs | Wonderware | ArchestrA IDE).
The Connect to Galaxy dialog box appears with the local node name displayed in the GR node name drop-down list. In this example, X00STD is the local computer name.
The Connect to Galaxy dialog box appears with the local node name displayed in the GR node name drop-down list. In this example, X00STD is the local computer name.
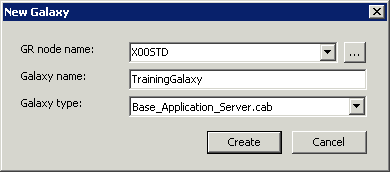
Step 2. Click the New Galaxy button to create a new Galaxy. The New Galaxy dialog box appears.
Step 3. In the Galaxy name field, enter TrainingGalaxy.
In the Galaxy type field, confirm Base_Application_Server.cab is selected.
Step 2. Click the New Galaxy button to create a new Galaxy. The New Galaxy dialog box appears.
Step 3. In the Galaxy name field, enter TrainingGalaxy.
In the Galaxy type field, confirm Base_Application_Server.cab is selected.
Step 2. Click the New Galaxy button to create a new Galaxy. The New Galaxy dialog box appears.
Step 3. In the Galaxy name field, enter TrainingGalaxy.
In the Galaxy type field, confirm Base_Application_Server.cab is selected.
Step 4. Click Create.
Step 4. Click Create.
Step 4. Click Create.
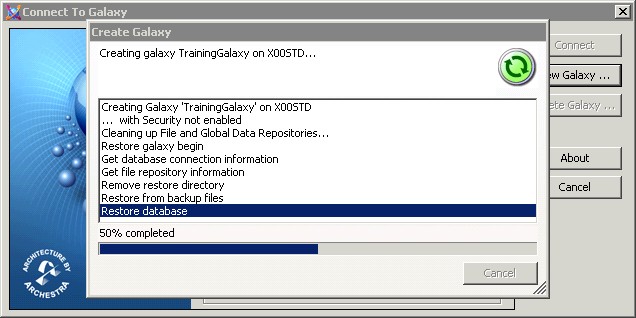
Step 5. When the Create Galaxy progress displays 100% completed, click Close.
Step 5. When the Create Galaxy progress displays 100% completed, click Close.
Step 5. When the Create Galaxy progress displays 100% completed, click Close.
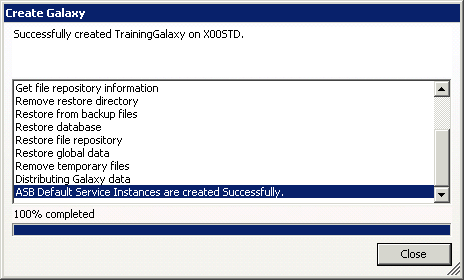
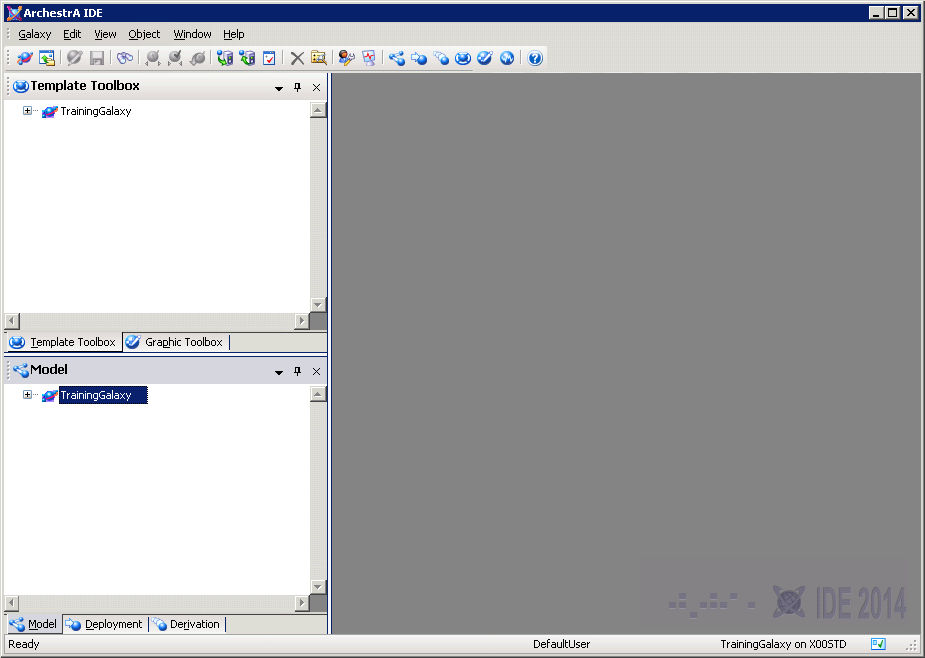
The newly created TrainingGalaxy now appears in the Galaxy name drop-down list.
The newly created TrainingGalaxy now appears in the Galaxy name drop-down list.
The newly created TrainingGalaxy now appears in the Galaxy name drop-down list.
Step 6. Click Connect.
Step 6. Click Connect.
Step 6. Click Connect.
Import the Galaxy Objects
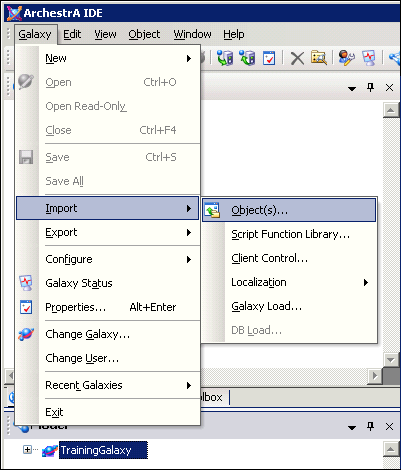
Step 7. On the Galaxy menu, click Import | Object(s).
Import the Galaxy Objects
Step 7. On the Galaxy menu, click Import | Object(s).
Import the Galaxy Objects
Step 7. On the Galaxy menu, click Import | Object(s).
The Import Automation Object(s) dialog box appears.

Download Object
Navigate to Object.
Click GalaxyObjects.aaPKG.
Step 8. Click Open.
The Import Preferences dialog box appears.
The Import Automation Object(s) dialog box appears.
Download Object
Navigate to Object.
Click GalaxyObjects.aaPKG.
Step 8. Click Open.
The Import Preferences dialog box appears.
The Import Automation Object(s) dialog box appears.
Download Object
Navigate to Object.Click GalaxyObjects.aaPKG.
Step 8. Click Open.
The Import Preferences dialog box appears.
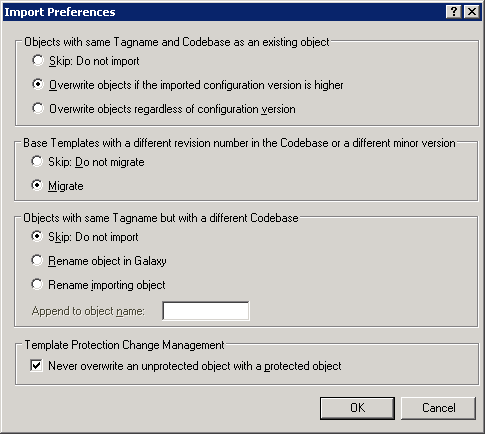
Step 9. Leave the default settings and click OK.
The Import Automation Object(s) dialog box appears.
Step 9. Leave the default settings and click OK.
The Import Automation Object(s) dialog box appears.
Step 9. Leave the default settings and click OK.
The Import Automation Object(s) dialog box appears.
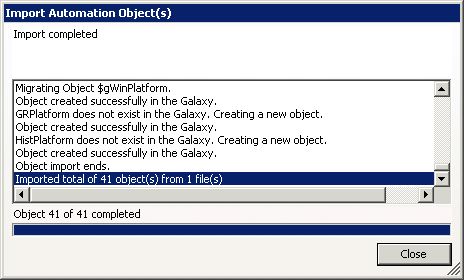
Step 10. Click Close.
Configure Galaxy Objects
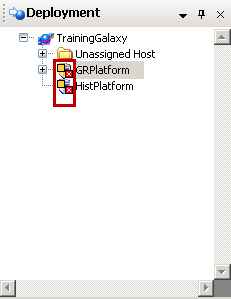
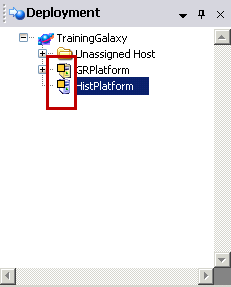
Step 11. In the Deployment view, expand TrainingGalaxy and notice that the two platforms
GRPlatform and HistPlatform have configuration errors.
Step 10. Click Close.
Configure Galaxy Objects
Step 11. In the Deployment view, expand TrainingGalaxy and notice that the two platforms
GRPlatform and HistPlatform have configuration errors.
Step 10. Click Close.
Configure Galaxy Objects
Step 11. In the Deployment view, expand TrainingGalaxy and notice that the two platforms
GRPlatform and HistPlatform have configuration errors.
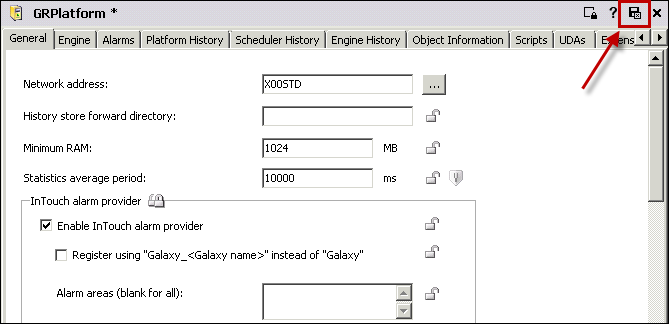
Step 12. Double-click the GRPlatform object to open its configuration editor.
Step 13. In the General tab, configure the Network address field with the computer name provided by your instructor.
In this example, the GRPlatform will be deployed on X00STD.
Step 14. In the top-right corner of the pane, click the Save and Close button.
The Check In dialog box appears.
The Check In dialog box appears.
The Check In dialog box appears.
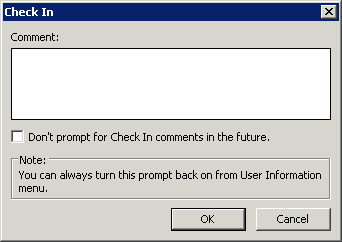
Step 15. In the Comment field, enter a comment and then click OK.
Step 16. Double-click the HistPlatform object to open its configuration editor.
Step 17. On the General tab, configure the Network address field with the computer name provided by your instructor.
In this example, HistPlatform will be deployed on X01STD.
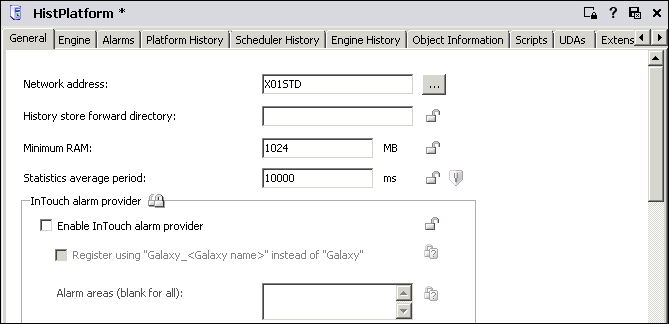
Step 18. Click Save and Close.
The Check In dialog box appears.
Step 19. Enter your comment and click OK.
and HistPlatform have been checked in and configured.
Step 18. Click Save and Close.
The Check In dialog box appears.
Step 19. Enter your comment and click OK.
and HistPlatform have been checked in and configured.
Step 18. Click Save and Close.
The Check In dialog box appears.
Step 19. Enter your comment and click OK.
and HistPlatform have been checked in and configured.
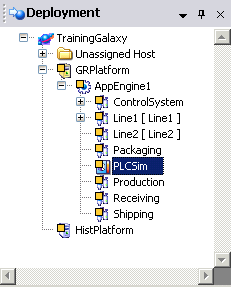
Step 20. In the Deployment view, expand GRPlatform and AppEngine1 and then double-click the
Step 20. In the Deployment view, expand GRPlatform and AppEngine1 and then double-click the
Step 20. In the Deployment view, expand GRPlatform and AppEngine1 and then double-click the
Step 21. On the General tab, configure the Server node field with the computer name provided by your instructor. In this example, the server is located on IC1.
Step 21. On the General tab, configure the Server node field with the computer name provided by your instructor. In this example, the server is located on IC1.
Step 21. On the General tab, configure the Server node field with the computer name provided by your instructor. In this example, the server is located on IC1.
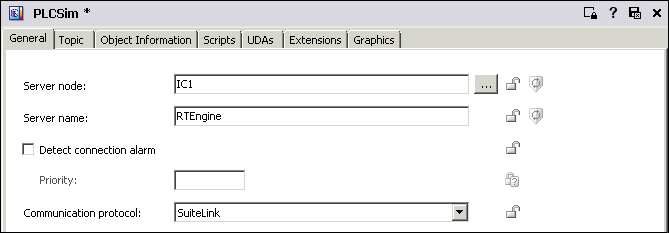
Step 22. Click Save and Close.
The Check In dialog box appears.
Step 23. Enter your comment and click OK.
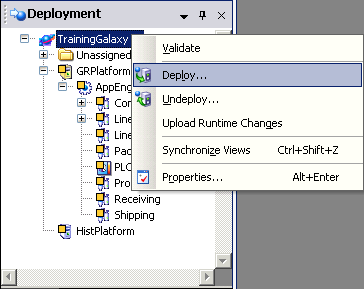
Deploy the Galaxy
Step 24. In the Deployment view, right-click Training Galaxy and select Deploy. Now that all objects are configured, you will deploy the Galaxy.
Step 22. Click Save and Close.
The Check In dialog box appears.
Step 23. Enter your comment and click OK.
Deploy the Galaxy
Step 24. In the Deployment view, right-click Training Galaxy and select Deploy. Now that all objects are configured, you will deploy the Galaxy.
Step 22. Click Save and Close.
The Check In dialog box appears.
Step 23. Enter your comment and click OK.
Deploy the Galaxy
Step 24. In the Deployment view, right-click Training Galaxy and select Deploy. Now that all objects are configured, you will deploy the Galaxy.
The Deploy dialog box appears.
The Deploy dialog box appears.
The Deploy dialog box appears.
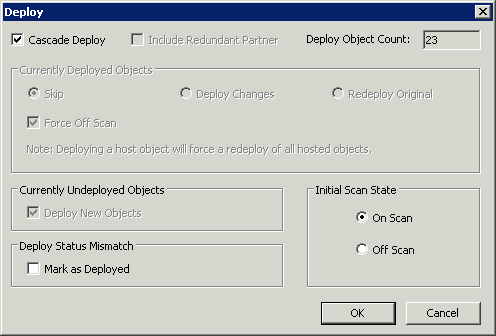
Step 25. Leave the default settings and click OK.
Step 25. Leave the default settings and click OK.
Step 25. Leave the default settings and click OK.
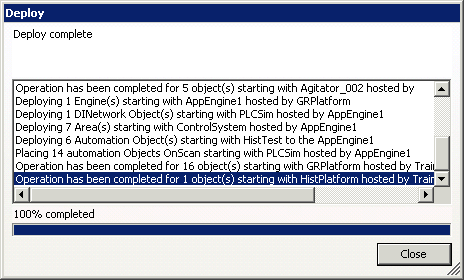
When the progress displays 100% completed, click Close.
View Data in Runtime
Now that your Galaxy is deployed in the runtime environment, you will use Object Viewer to monitor runtime data.
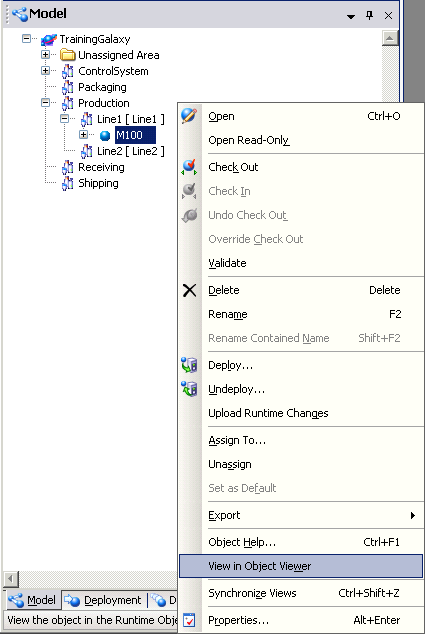
Step 26. Select the Model view and expand TrainingGalaxy\Production\Line1.
Step 27. Right-click M100 and select View in Object Viewer.
When the progress displays 100% completed, click Close.
View Data in Runtime
Now that your Galaxy is deployed in the runtime environment, you will use Object Viewer to monitor runtime data.
Step 26. Select the Model view and expand TrainingGalaxy\Production\Line1.
Step 27. Right-click M100 and select View in Object Viewer.
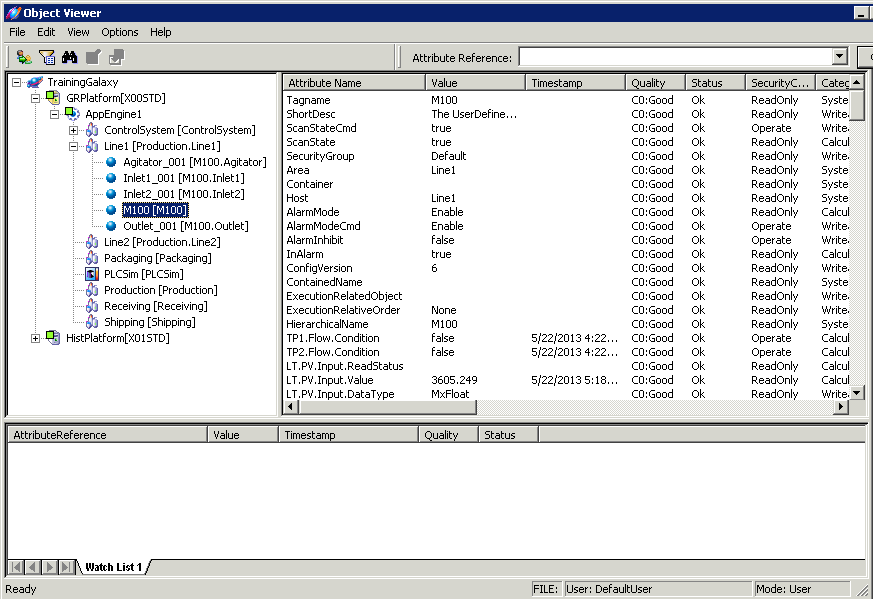
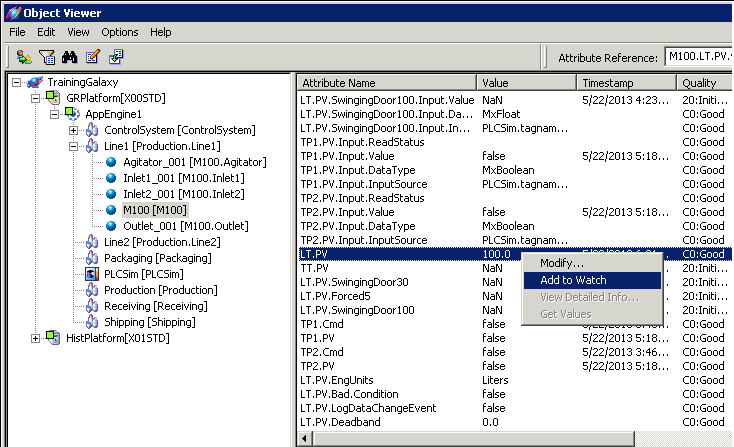
Step 28. In the console tree pane, ensure that M100 is selected, and then in the details pane, right-click
LT.PV and select Add to Watch.
Step 28. In the console tree pane, ensure that M100 is selected, and then in the details pane, right-click
LT.PV and select Add to Watch.
Step 28. In the console tree pane, ensure that M100 is selected, and then in the details pane, right-click
LT.PV and select Add to Watch.
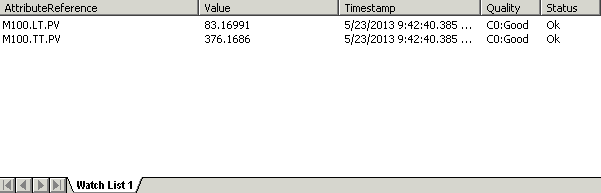
Verify both attributes LT.PV and TT.PV have good quality values and are changing.
Verify both attributes LT.PV and TT.PV have good quality values and are changing.
Verify both attributes LT.PV and TT.PV have good quality values and are changing.
Step 29. Close Object Viewer.
Step 29. Close Object Viewer.
Step 29. Close Object Viewer.
Last modified: Monday, 11 May 2020, 2:22 PM