Topic 13.1.1: Overview
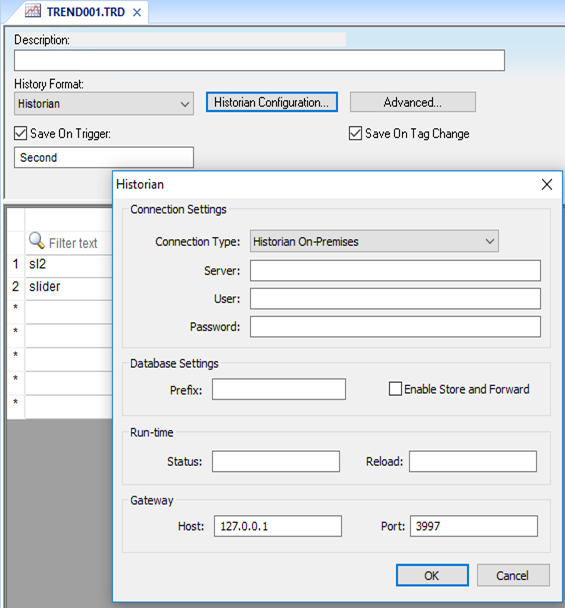
- Right-click the Trends folder in the Project Explorer, and then click Insert on the shortcut menu. In history format select historian.
- Select historian configuration. In the settings for the selected connection type are displayed.

- In the Server box, type the host name or IP address and port number of the Historian database server. For example, HistorianDBServer:32568.
- The port number is optional. If you did not change the port number in the Historian database settings, you can omit it here and the default (port 32568) will be used. Otherwise, the port number must match the one that is specified in the Historian database settings.
- In the User and Password boxes, type your credentials to access the Historian database.
- In the Database Settings area, in the Prefix box, type a prefix that will be added to the tags saved in the database in order to keep them grouped together. For example, if you are configuring the connection for Trend worksheet TREND001, you could make that the prefix as well.
- If you want to store historical data when the connection is unavailable and then forward the stored data when the connection is reestablished, select Enable store and forward.
- The historical data will be saved in your project folder (on the project runtime server). Please note that this can consume a large amount of hard drive space if the connection is unavailable for a long time.
- In the Run-time area, in the Status box, type the name of a project tag (Integer type) that will receive codes describing the status of the connection during project run time.
- In the Gateway area, in the Host and Port boxes, type the host name or IP address and port number of the database gateway that your project will use.
- Click OK to save the settings and close the dialog box.
Last modified: Friday, 5 July 2019, 9:49 AM
