Lab 34 – Using Recipes
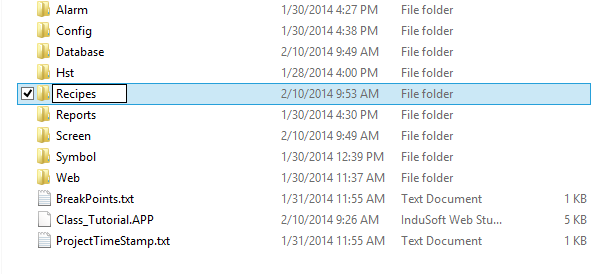
Step 1: Open Windows Explorer, navigate to your project folder, and create a folder called Recipes.

Step 2: On the Insert tab of the Ribbon, in the Global group, click on Class.

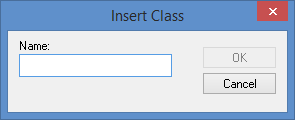
The Insert Class dialog box is opened.

Step 3: In the field called Name, enter RecipeClass.
![]()
Step 4: Click OK. The Insert Class dialog box is closed and the Class: RecipeClass worksheet is opened in the Workspace.
Step 5: Configure the class as shown below.

Step 6: Close the Class: RecipeClass worksheet.
Step 7: On the Global tab of the Project Explorer, expand the Project Tags folder, right-click Datasheet View, and select Open on the shortcut menu. The Project Tags worksheet is opened in the Workspace.
Step 8: Create the tags shown below.

Step 9: Close the Project Tags worksheet.
- Recipe Task
Step 10: On the Insert tab of the Ribbon, in the Task Worksheets group, click Recipe.

A blank Recipe worksheet is opened in the Workspace.
Step 11: In the File Name field, enter Recipes\{cRecipe.sRecipeName} as shown below.
![]()
Step 12: Enable the options called Save as XML and Unicode as shown below.

Step 13: Add the four real-type members of the cRecipe tag to the Tag Name column of the recipe worksheet as shown below.

Step 14: Save the worksheet and name it Recipe1.
Step 15: Close the Recipe1 worksheet.
Create a Driver Worksheet
Step 16: On the Comm tab of the Project Explorer, expand the Drivers folder, right-click on MOTCP, and select Insert.

A new standard driver worksheet is opened in the Workspace.
Step 17: Configure the worksheet as shown below or as instructed by the instructor.

Step 18: Save the worksheet as sheet number 1 and close the worksheet.

- Recipe Screen
Step 19: Open the Template screen.
Step 20: Click the Application button and click Save As on the Application menu. The Save As dialog box is opened.
Step 21: In the File name field, enter Recipes.
Step 22: Click Save. The Save As dialog box is closed.
Step 23: On the Graphics tab of the Ribbon, in the Libraries group, click Symbols. The Symbols library is opened on the Workspace.
Step 24: Expand the System Symbols folder, and then click on the folder called TextIO.
Step 25: Select the symbol called text_input03.
Step 26: Click on the Recipes.scc tab on the Workspace to select the Recipes screen, and then click near the upper left corner on the Recipes screen to paste the symbol.

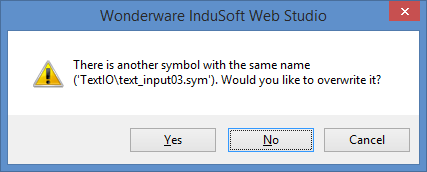
If you see the following message, then click Yes.

Step 27: Open the Object Properties of the text_input03 symbol and configure them as shown below.
Step 28: Close the Object Properties dialog box.
Step 29: Click on the Symbols tab on the Workspace, and select the symbol called numeric_input1.
Step 30: Click on the Recipes.scc tab on the Workspace to select the Recipes screen, and then click below the previous symbol on the Recipes screen to paste the symbol.

If you see the following message, then click Yes.

Step 31: Open the Object Properties of the symbol and configure them as shown below.

Step 32: Close the Object Properties dialog box.
Step 33: Repeat steps 29 through 32 for the tags called cRecipe.rParamB, cRecipe.rParamC, and cRecipe.rParamD.
Step 34: Close the Symbols tab on the Workspace.
Step 35: On the Graphics tab of the Ribbon, in the Active Objects group, click Button and add a button to the Recipes screen to the right of the upper most symbol.
Step 36: Open the Object Properties of the button.
Step 37: In the field called Caption, enter Save.
Step 38: Click Command. The Command animation object properties are displayed.
Step 39: Set Type to VBScript and, enter the following in the body of the On Down event.
$Recipe("Save:Recipe1.rcp")
Step 40: Close the Object Properties dialog box.
Step 41: On the Graphics tab of the Ribbon in the Active Objects group, select Button and add a button to the Recipes screen below the previous button.
Step 42: Open the Object Properties of the button.
Step 43: In the Caption field, enter Load.
Step 44: Click Command.
Step 45: Set Type to VBScript, and enter the following in the body of the On Down event.
If $RdFileN("sLoadRecipeName","Recipes","*.xml",0) = 0 Then
$sLoadRecipeName = Replace($sLoadRecipeName,"Recipes\","")
$cRecipe.sRecipeName = Replace($sLoadRecipeName,".xml","")
$Recipe("Load:Recipe1.rcp")
$bWriteRecipe = $Toggle($bWriteRecipe)
End If
Step 46: Close the Object Properties dialog box.
Step 47: The Recipes screen should like similar to the one shown below.

Step 48: Save and close the RECIPES screen.
Step 49: If your runtime is on a remote machine, then use the Remote Management tools on the Home tab of the Ribbon to download your project to the remote machine.
Step 50: Start the runtime.
Step 51: Open the RECIPES screen.
Step 52: Fill in the text fields and save some recipes.
Step 53: Load some saved recipes.
Step 54: Use Windows Explorer to verify that recipe files are being stored in the folder called Recipes that you created in your project folder.
