Lab 4: Create Screens
- Header screen
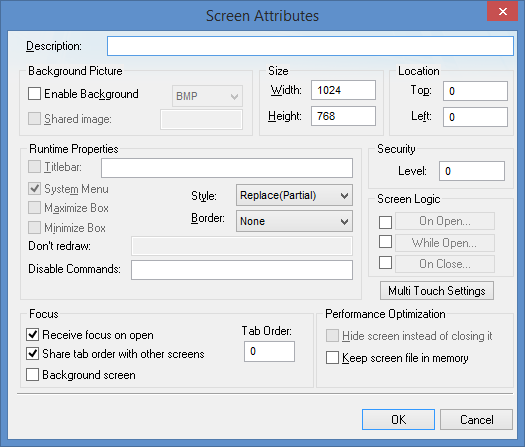
Step 1:On the Insert tab of the ribbon, in the Graphics group, click Screen.

The Screen Attributes dialog box is opened.

Step 2: In the Size group, in the Width and Height fields, enter 1024 and 150, respectively.

Step 3: Click OK to close the Screen Attributes dialog box. The new screen is opened in the Workspace.

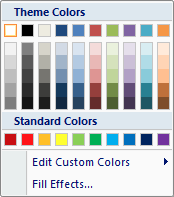
Step 4: On the Graphics tab of the ribbon, in the Graphics group, click Background Color.

Theme Colors dialog box is opened.

Step 5: Select the medium Olive Green color.
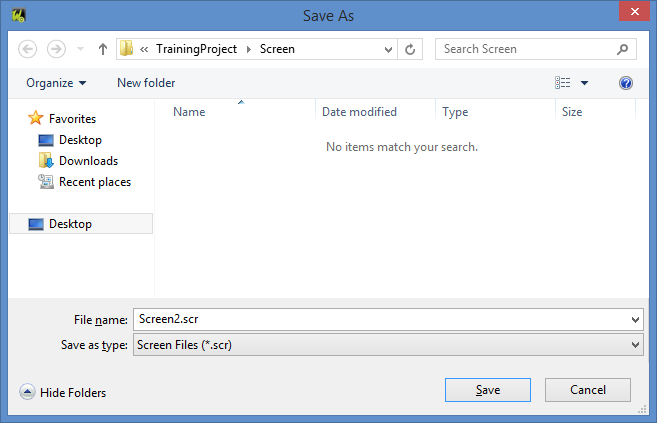
Step 6: Click the Application button and click Save As on the Application menu. The Save As dialog box is opened.

Step 7: In the File name field, enter Header.
![]()
Step 8: Click Save. The Save As dialog box is closed.
Navigation screen
Step 9: On the Insert tab of the ribbon, in the Graphics group, click Screen. The Screen Attributes dialog box is opened.
Step 10: In the Size group, in the Width and Height fields, enter 150 and 618, respectively.

Step 11: In the Location group, in the Top field, enter 150.

Step 12: Click OK to close the Screen Attributes dialog box. The new screen is opened in the Workspace.
Step 13: Click the tab on the Workspace corresponding to the new screen.
Step 14: On the Graphics tab of the ribbon, in the Graphics group, click Background Color. Theme Colors dialog box is opened.
Step 15: Select the light Olive Green color.
Step 16: Click the Application button and click Save As on the Application menu. The Save As dialog box is opened.
Step 17: In the File name field, enter Navigation.
![]()
Step 18: Click Save. The Save As dialog box is closed.
- Template screen
Step 19: On the Insert tab of the ribbon, in the Graphics group, click Screen. The Screen Attributes dialog box is opened.
Step 20: In the Size group, in the Width and Height fields, enter 874 and 618, respectively.

Step 21: In the Location group, in the Top and Left fields, enter 150.

Step 22: Click OK to close the Screen Attributes dialog box. The new screen is opened in the Workspace.
Step 23: Click the tab on the Workspace corresponding to the new screen.
Step 24. On the Graphics tab of the ribbon, in the Graphics group, click Background Color. Theme Colors dialog box is opened.
Step 25. Select the light Gray color.
Step 26: Click the Application button and click Save As on the Application menu. The Save As dialog box is opened.
Step 27: In the File name field, enter Template.
![]()
Step 28: Click Save. The Save As dialog box is closed.
- Main screen
Step 29: Click the Template.scc tab on the Workspace.
![]()
Step 30: Click the Application button and click Save As on the Application menu. The Save As dialog box is opened.
Step 31: In the File name field, enter Main.
![]()
Step 32: Click Save. The Save As dialog box is closed.
