Device Configuration
Before Configuring Device you must have to configure Meter_Make Master, Protocol master(which is already inserted in Database ),Energy type, Master parameter list regarding to this Meter_make.
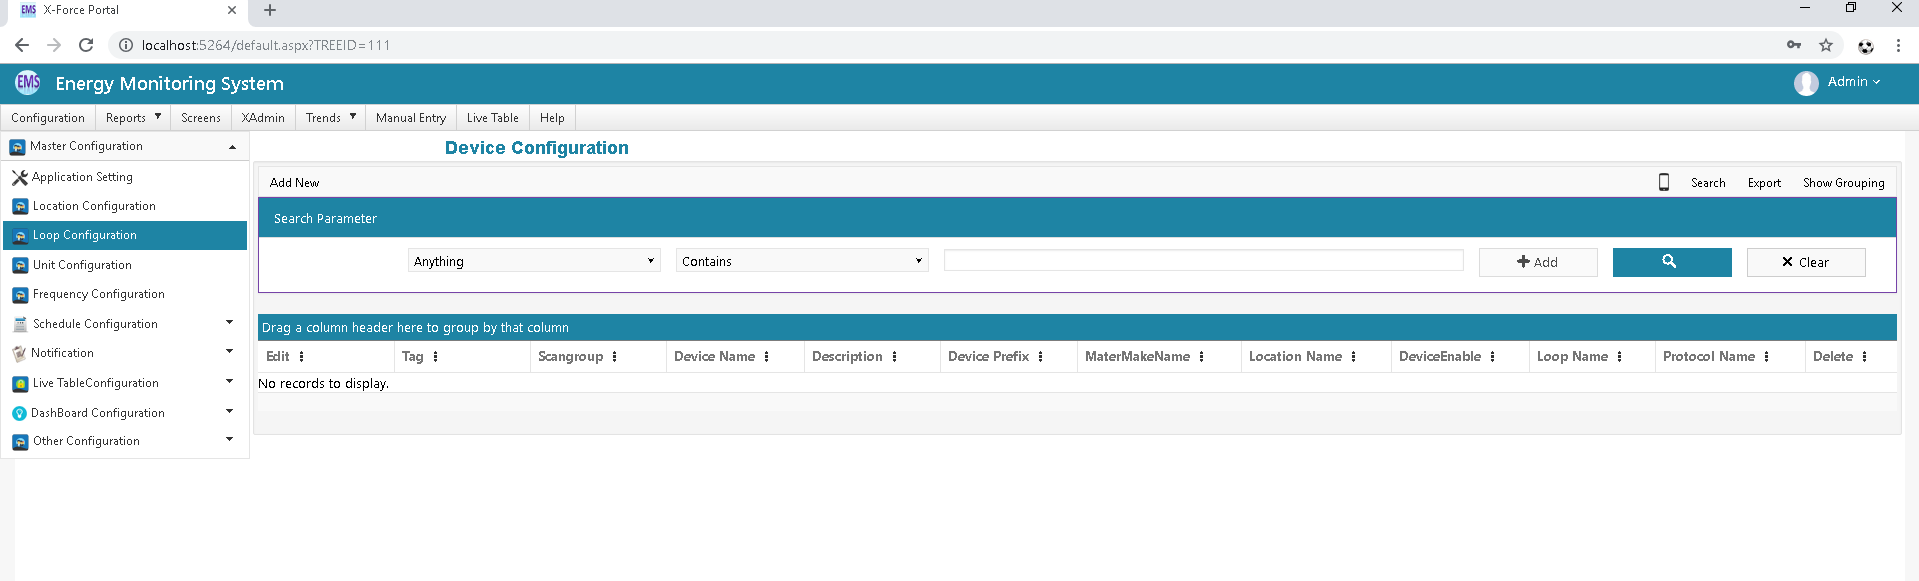
To Configure Device(Meter) Click on Add New Button .
In Device Configuration,do following to configure Energy meter:
- Select Meter_Make type, as which type of Meter_Make(i.e Conserv,Secure,L&T,ICD etc) is used as Energy meter.
- Select Protocol as which type of connection(Serial,TCP,OPCDA) is applied in the device(EM)
- Configure Slave address, which is the Device Address given physically in meter i.e which is assigned in meter as Device Id.
In the Device Config give frequency(i.e 1s,2s,5s,15s ...) as it will be the time required for DAS to fetch data from Energy meter.
Select parameter of the Device which is related to your meter make from (right top corner drop down) and select parameter which either required as trend data or report data or for both.
Trend data is real time data (analog data), for that select 'Isonline' and for Reading data which is for consumption of EM(always in increment mode parameters) select 'IsReading'. and these parameters to be report select 'IsReport'.
- Select location and loop for your device which is allocate for that location and loop as per user requirement.
- If you select OPCDA protocol then Device address must be OPC server ID which is auto generate in OPC server Configuration.
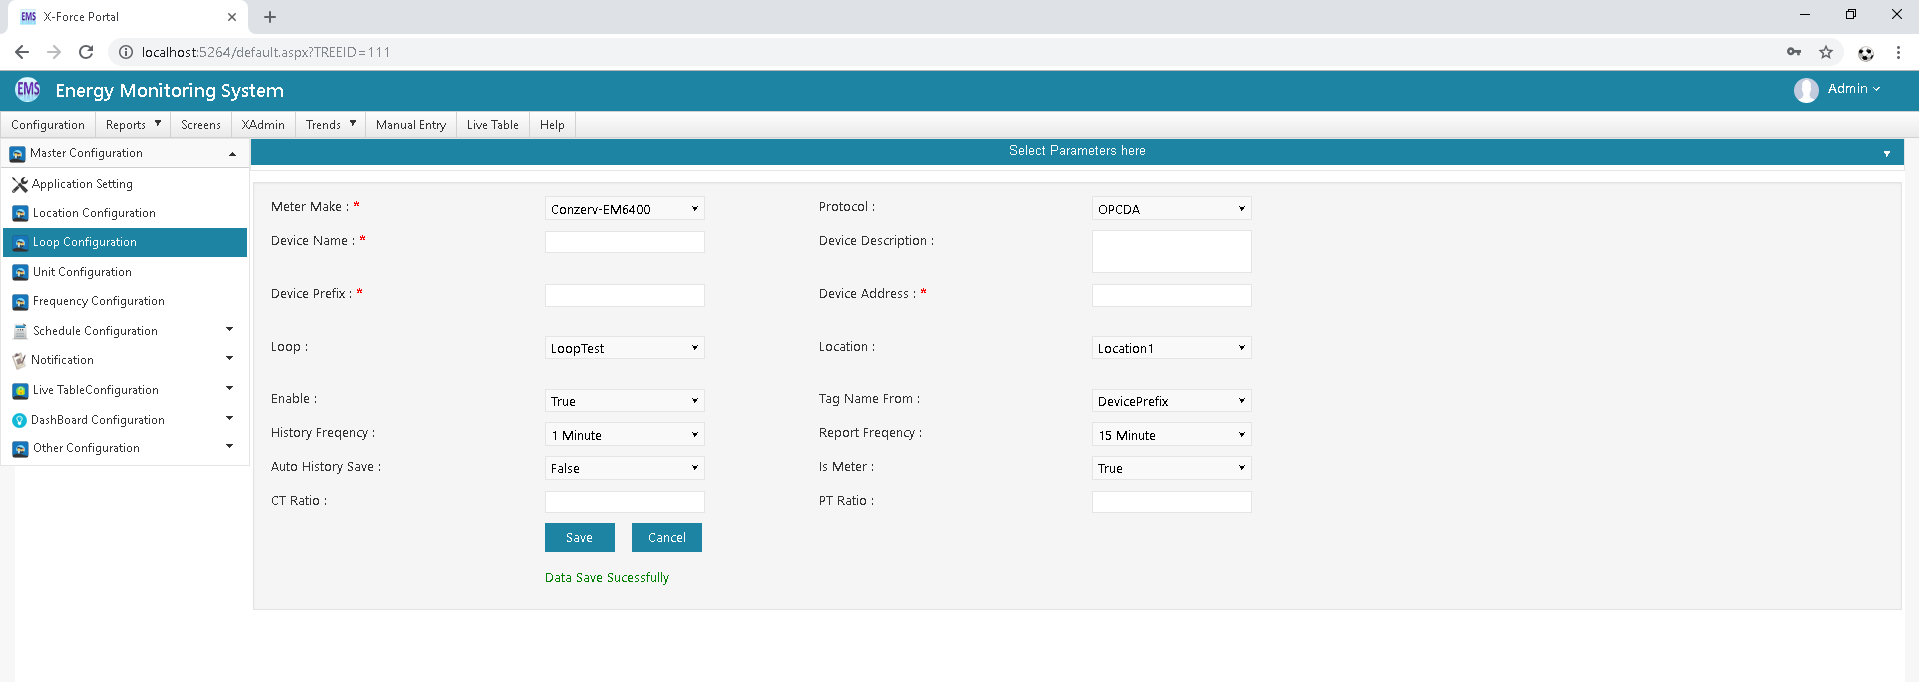
As per above figure please select add new Device button a display of follow will come:.
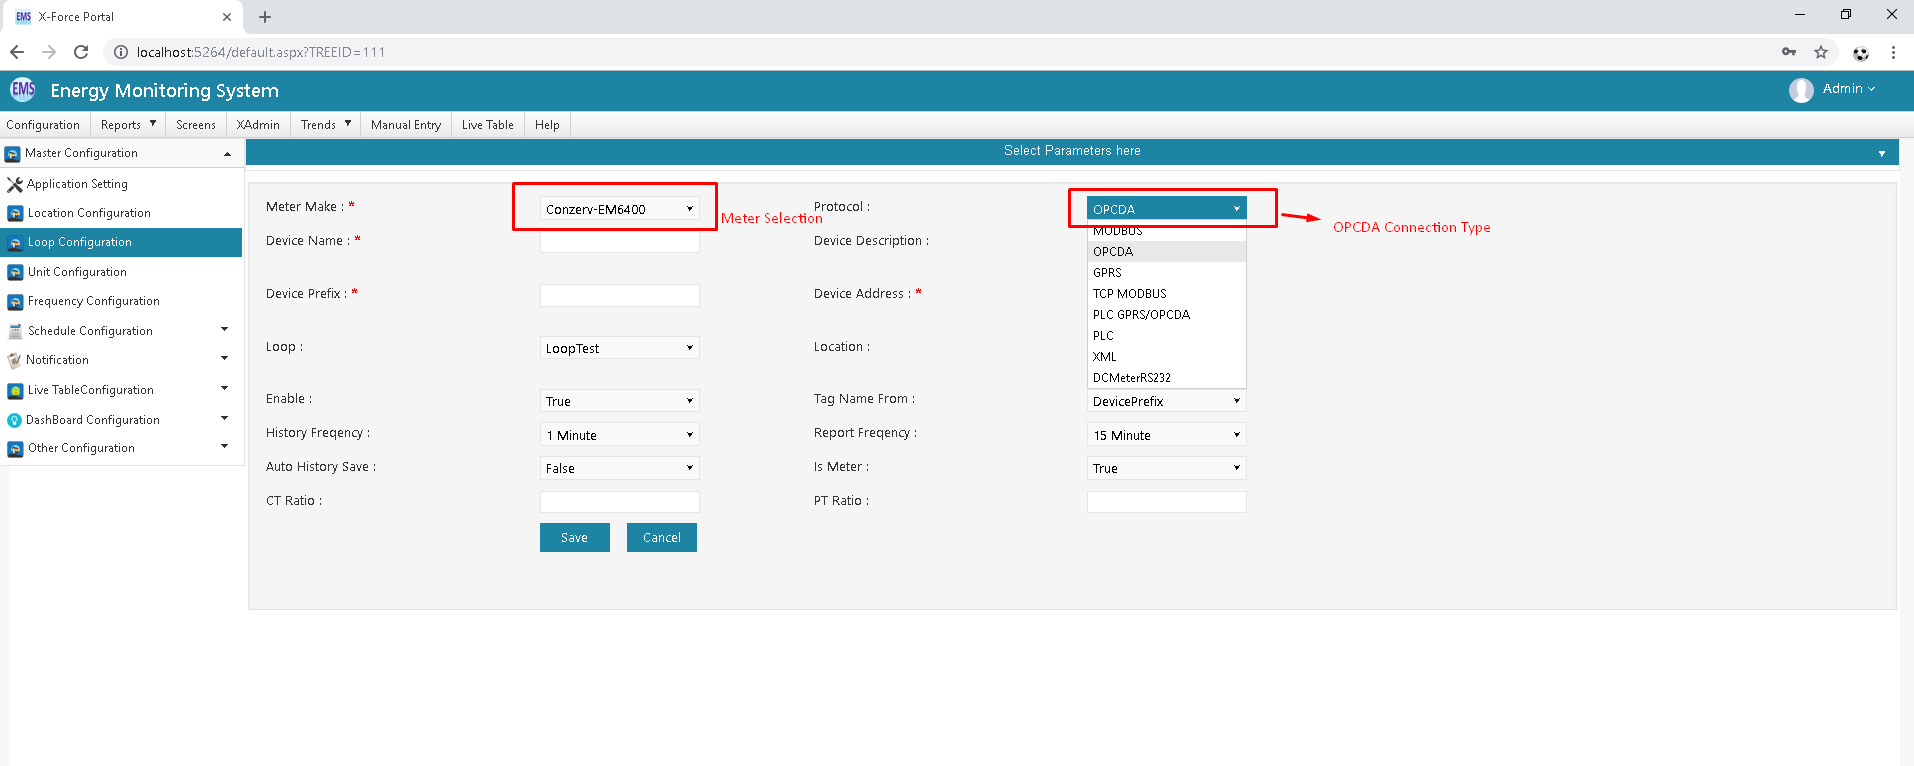
Above figure is the example for Add new energy meter.
- Select Meter_Make (here Conzerv meter)
- Select protocol depend on connection type made physically (here Modbus protocol)
- Expand Select parameter tab(Drop Down) and Select your Analog and Report parameters from List as user's need.
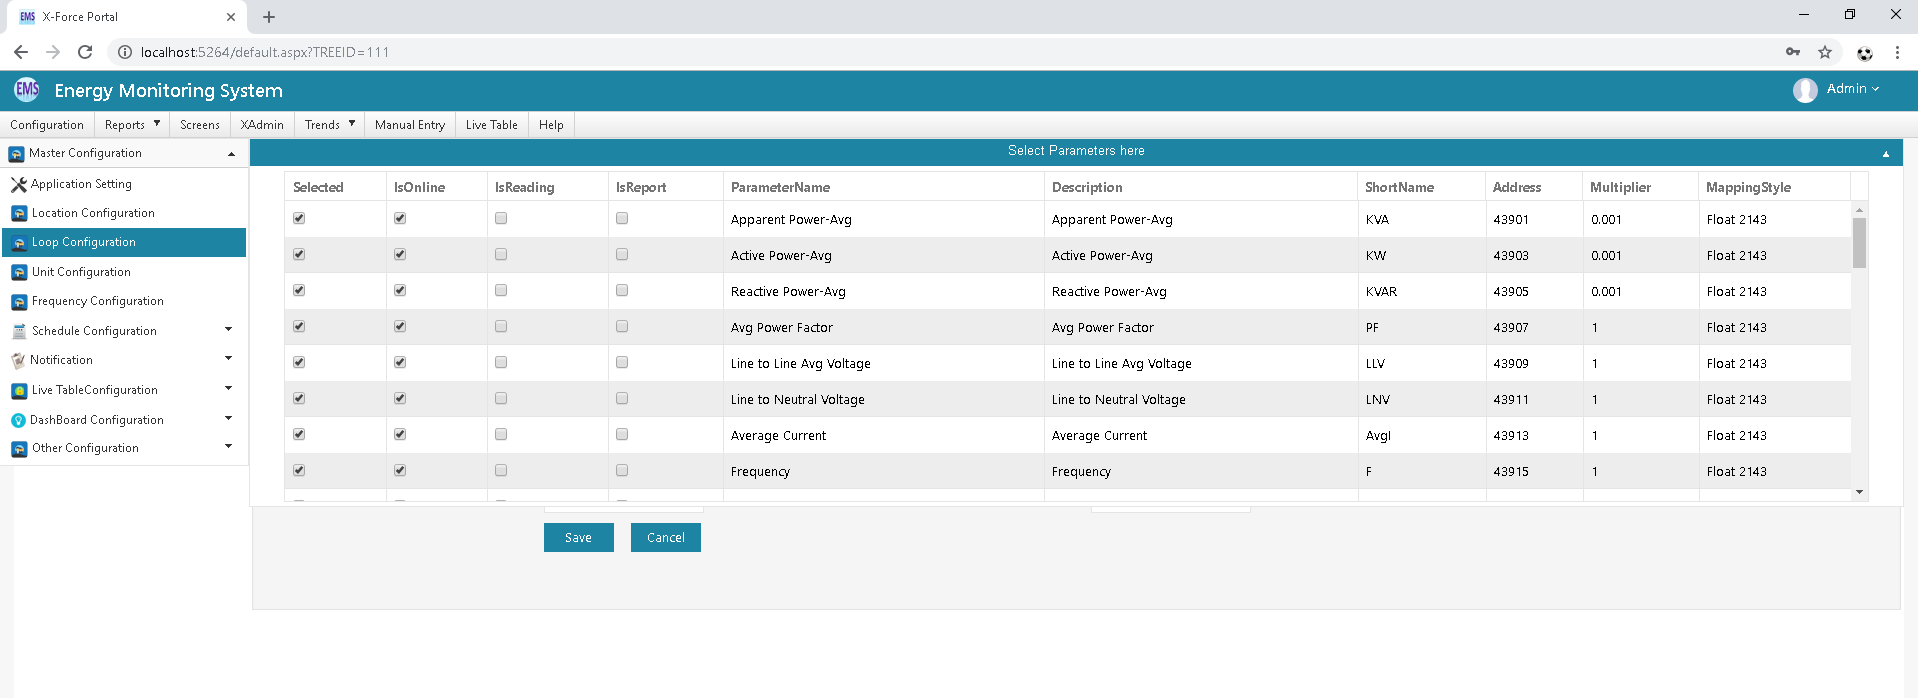
Analog data -→ Isonline, Report Data -→ Isreading
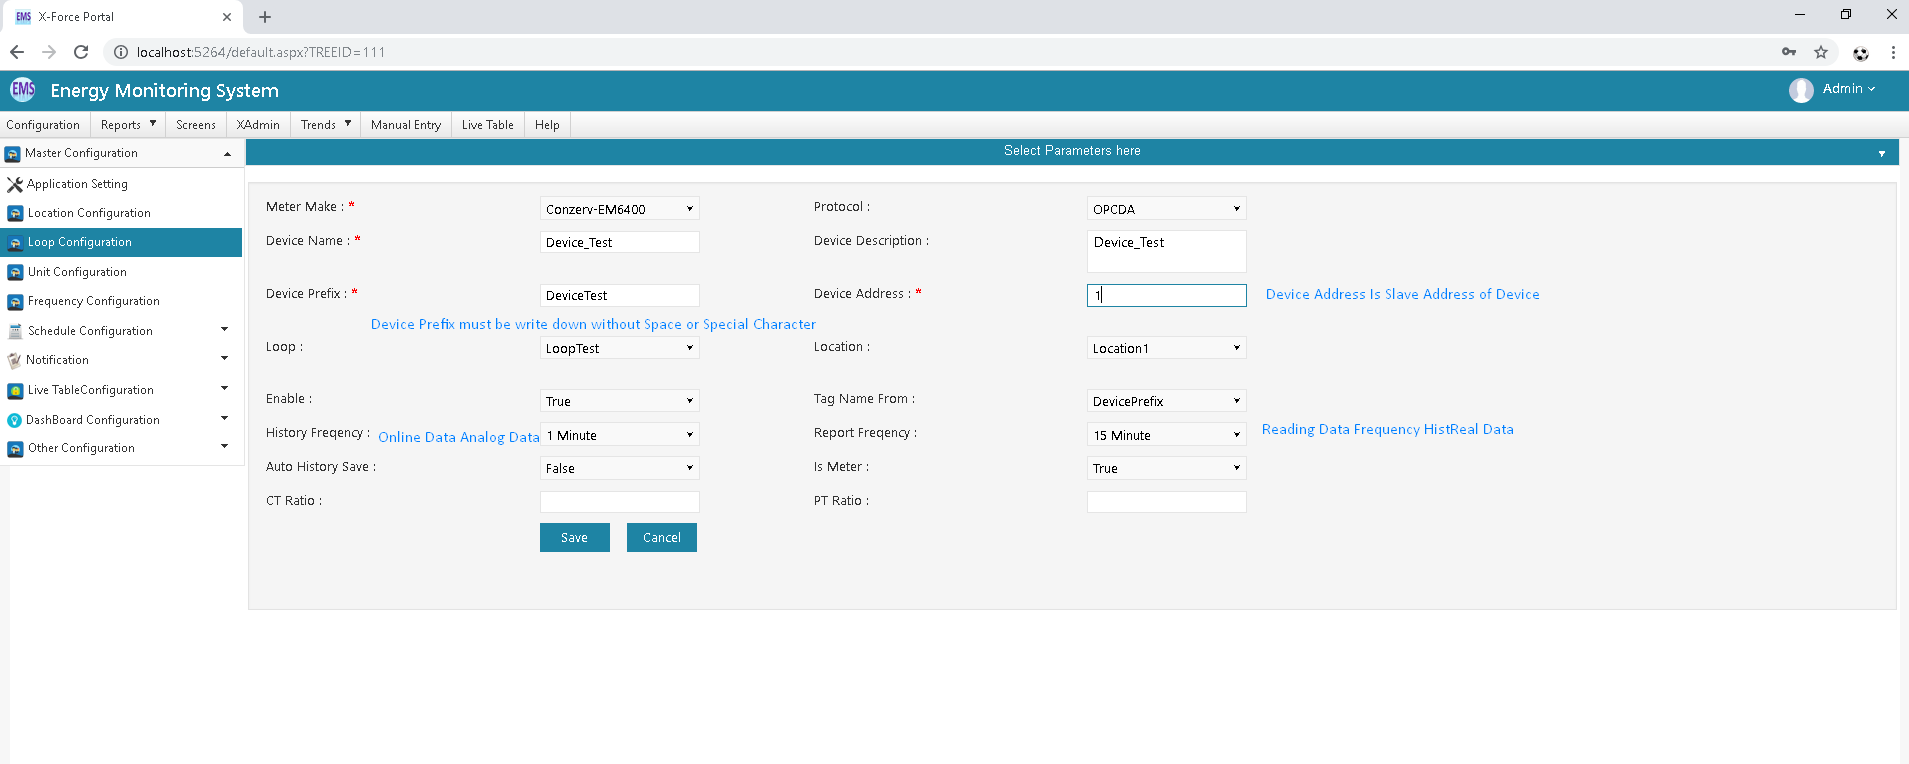
In above Screen Shot you can see the Loop, location which is Filled up as example which is selected as per need. Please Read note which is write down in above Figure. After configure Device Please Click on Save Button.
After save successfully ,it won't redirect to List view because if you want to add multiple device in a stretch ,you can add easily.
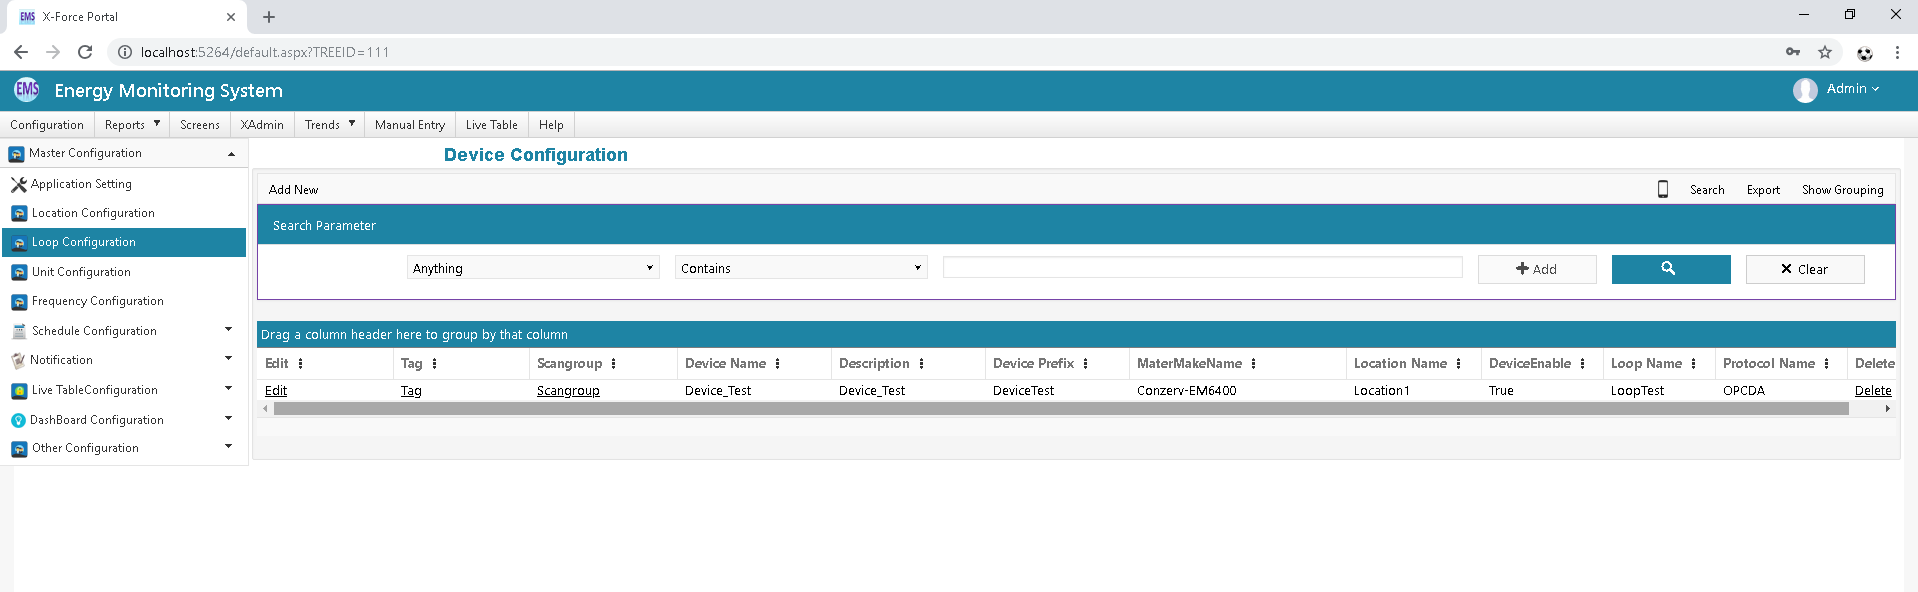
If you want to check that your Device is added or not, Please Follow the link as Loop→ Device Configuration(there it will show all the added devices).
| Sr No | Column | Column Description |
|---|---|---|
| 1 | Device Name | It should be given proper device name. |
| 2 | Device Address | Should be give Energy Meter salve address and also take care for Same Loop not insert Same Device Address |
| 3 | Meter Make | Select Configure Meter Make and Configure new if Not available in drop down list |
| 4 | Protocol | It should be use proper communication protocol like, OPC-DA,Mod bus,GPRS etc.. |
| 5 | Device Prefix | It should be proper meaningful device prefix without any space , Special character and name not start from Number. |
| 6 | Loop | Select Proper Loop name Which you want to insert device |
| 7 | Location | Select Location for bifurcation of set of energy device |
| 8 | Enable | It is use for Enable and disable device. |
| 9 | Tag Name From | It is Use for Auto Tag Name make from as per selection of device prefix and Device Name |
| 10 | History Frequency | It is Use for Set Frequency of Analog tag store in tbl_trans_histOnline Trend table and this parameter data display on Graphical view in Web Trend Application |
| 11 | Report Frequency | It is Use for set Frequency of Reading Tag store in tbl_Trans_histReal table and this data use for Reporting purpose |
| 12 | Auto History Save | Insert All Scan Request data on tbl_trans_histOnline Table |
| 13 | IsMeter | If IsMeter=True then Its Specify this is communication meter and for Set IsMeter=False then it specify Offline Meter |
| 14 | CT & PT Ratio | It is use for calculate Multiplication factor and Offset for only Satec Meter Make Only. So Use CT and PT Ratio field for only Satec Meter Make. |
| Sr No | Column | Column Description |
|---|---|---|
| 1 | Selected | checked parameter which you want to take parameter for particular selected device . |
| 2 | ISOnline | checked of online Parameter. It is used for this parameter in Trend Display Purpose. And Automatically This Parameter column create(Only One Column ShortName) in Tbl_trans_HistOnline Table and Tbl_mast_device Table. This is use for only analog Parameter. |
| 3 | IsReading | checked for reading. It is used for this parameter in Reporting Purpose. And Automatically This Parameter column create in Tbl_trans_HistReal Table(Two Column Create ShortName, ShortNameCON) and Tbl_mast_device Table(Only One Column ShortName). This Is use for Only Reading Parameter |
| 4 | IsReport | checked for Report. It is use for Store Data on Tbl_trans_HistReal Table. |
| 5 | Short Name | Short Name is use for create column of parameter |
| 6 | Multiplier | It is Use for get result data with multiplication with Row Data. Most Of It is Use of Convert Unit Like KW to MW. For This case use Multiplier 0.001 for Convert KW Unit Row data to Convert MW Unit Row data. |
| 7 | Mapping-Style | Mapping style is use for get Correct Data from energy meter. Different Different Mapping style we use Like Float2143,Float1234,Float3412,Float4321 etc.. |