Backup & Restore
Backup Database
Follow the below steps to take backup of a Database using SSMS:
- Open SQL Server Management Studio Express and connect to the SQL server.
- Expand Databases.
- Right-click on the database you want to back up, then select Tasks > Back up. (This is not avalbile for version 2018/2019)
- On the Back Up Database window, make sure the Database field contains the name of the database you want to back up.
- Select the Backup Type. By default, it is Full - leave it set to that.
- Click Remove to remove the default/last backup file name.
- Click Add to open the Select Backup Destination window.
- Click [...] next to the File Name field.
- On the Locate Database Files window, select the folder where you want to backup file to go. By default, it is ..\Microsoft SQL Server\MSSQL.<YourInstance>\MSSQL\Backup.
- In the File Name field, type the name for this backup, with a .bak extension. For example, xyz_20080221.bak for a backup of the XYZ database created on 21 February 2008.
- Click OK to close the Locate Database Files window.
- Click OK to close the Select Backup Destination window.
- Click OK to start the backup. The progress icon displays in the lower left corner, and a ‘completed successfully’ message displays when its done.
Backup using Command Line
"C:\Program Files\Microsoft SQL Server\140\Tools\Binn\osql.exe"
    -E -Q "BACKUP DATABASE mydatabase TO DISK='C:\tmp\db.bak' WITH FORMAT"
Backup Using Query
BACKUP DATABASE DBname
TO DISK = 'C:\Dbname.BAK'
Restore Database
Restore Using Query
Syntax
Restore database <Your database name> from disk = '<Backup file location + file name>'
Example
The following command is used to restore database called 'TestDB' with backup file name 'SSMDB.bak' which is available in 'D:\' location if you are overwriting the existed database.
Restore database TestDB from disk = ' D:\SSMDB_Full.bak' with replace
Restore Using SSMS (SQL SERVER Management Studio)
Step 1 − Connect to database instance named 'TESTINSTANCE' and right-click on databases folder. Click Restore database as shown in the following snapshot.
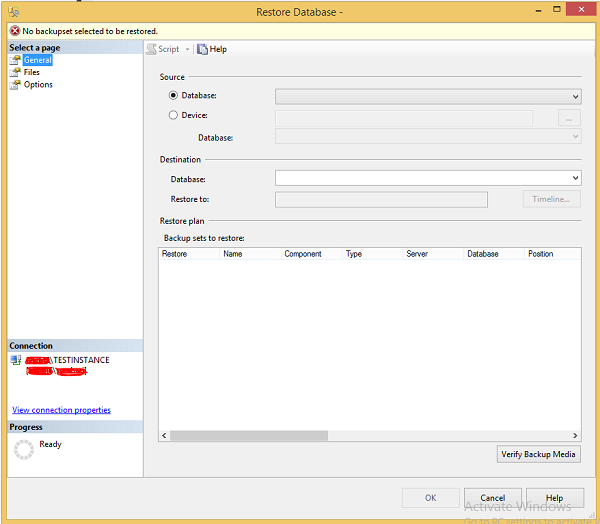
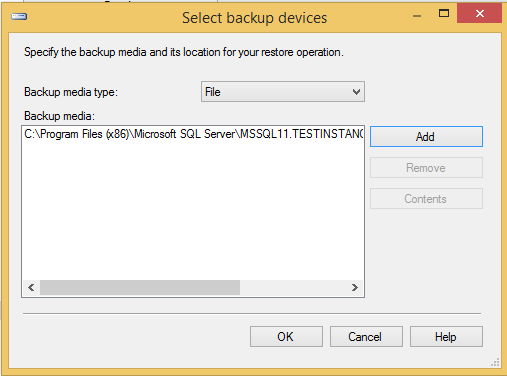
Step 2 − Select device radio button and click on ellipse to select the backup file as shown in the following snapshot.
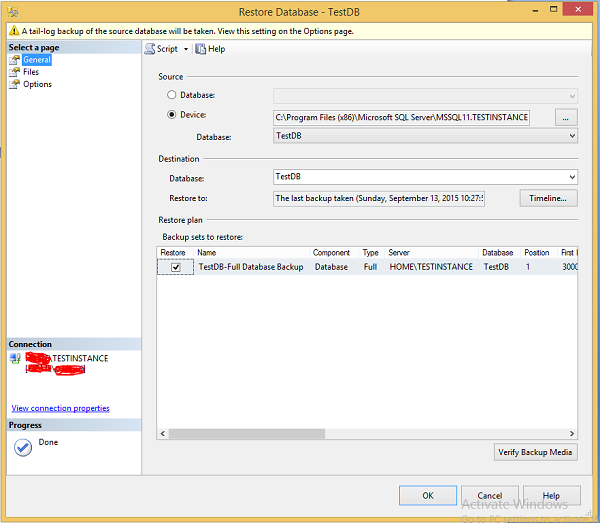
Step 3 − Click OK and the following screen pops up.
Step 4 − Select Files option which is on the top left corner as shown in the following snapshot.
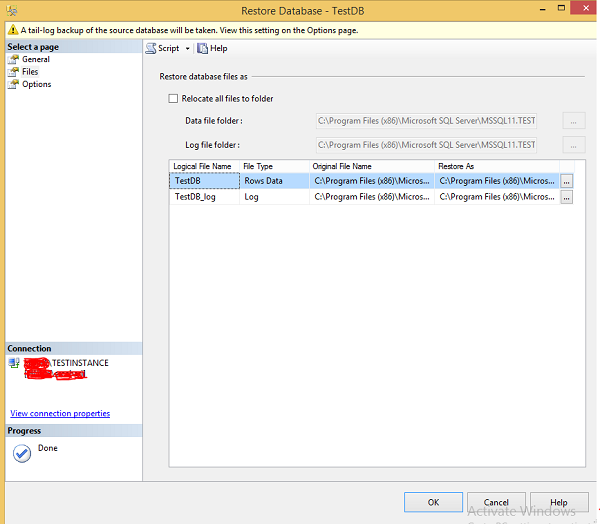
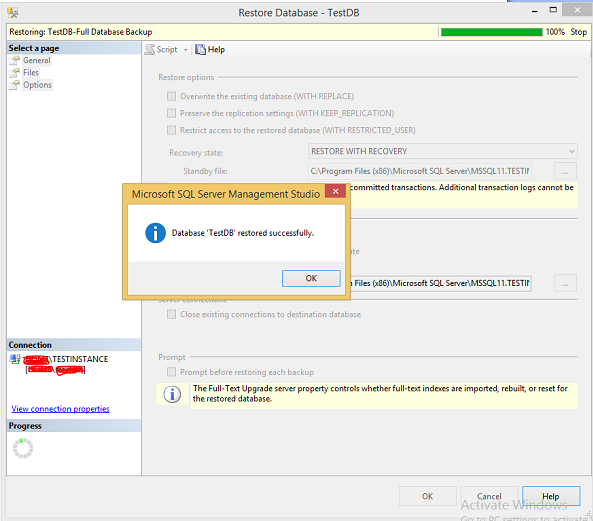
Step 5 − Select Options which is on the top left corner and click OK to restore 'TestDB' database as shown in the following snapshot.
