Topic 2.1.1 – Overview
Wonderware Historian Client Trend is an application that provides a graphic view of the historical data for selected tags. It also allows you to view multiple Historians and multiple versions of the Historian Server at the same time.
Once tags have been added to a trend chart, the tag data can be manipulated in a variety of ways, including panning, zooming, and scaling. Wonderware Historian Client Trend can be customized by configuring display options and setting general options for use with all trends displayed on a particular workstation, known as a workspace.
The trend charts and their associated data information can be printed, so that they may be analyzed away from the client machine.
Trend is the most frequently used Wonderware Historian Client application.
Wonderware Historian Client Trend Interface
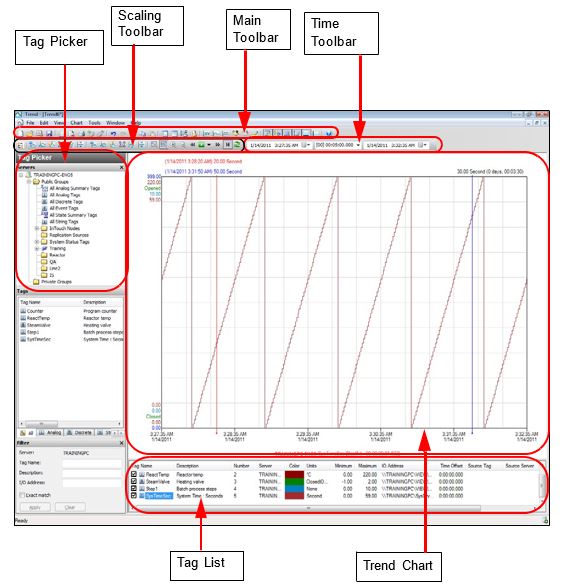
Start Wonderware Historian Client Trend
Step 1. Open Wonderware Historian Client Trend. The Trend window appears.
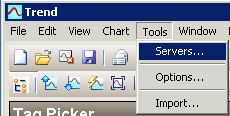
Connect to the Server
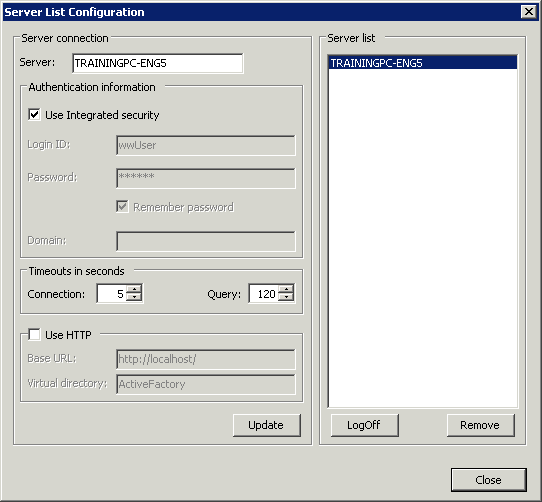
Step 1. On the Tools menu, click Servers.
Step 2. The Server List Configuration dialog box appears.
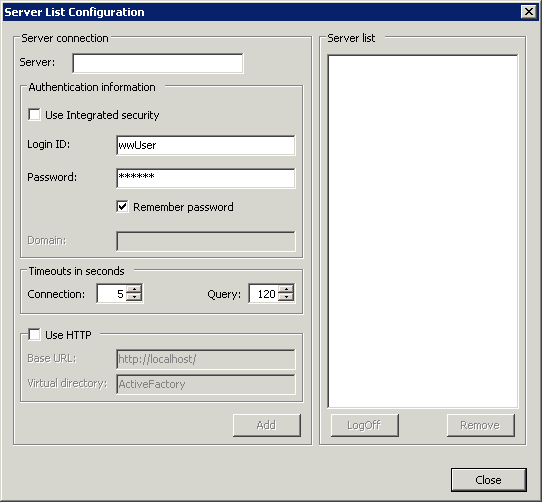
The Server List Configuration dialog box enables you to configure connection properties to multiple Historians.
The following information is used to configure a connection to Historian Server:
- Server name
- User login ID
- Password associated with the login ID
- An option to use the integrated security
- Time-out parameters for connections and queries
- An option to remember the password between instances of the application
- An option to use HTTP as the Server Connection Protocol
Step 3. Configure the Server List Configuration dialog box with the information
Step 4. When connecting to the Historian Server for the first time, you may see the following message:
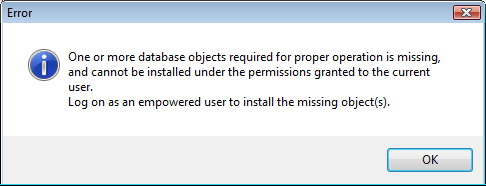
Step 5. Click OK to return to the Server List Configuration dialog box.
Step 6. Click Add.
The name of the Historian Server appears in the Server list pane.
Wonderware Historian Client Trend is now connected to the designated Historian Server.
Highlighting the server name in the Server list pane enables the LogOn and Remove buttons. If the highlighted server connection is active, the LogOn button changes to LogOff to allow disconnecting from that server.
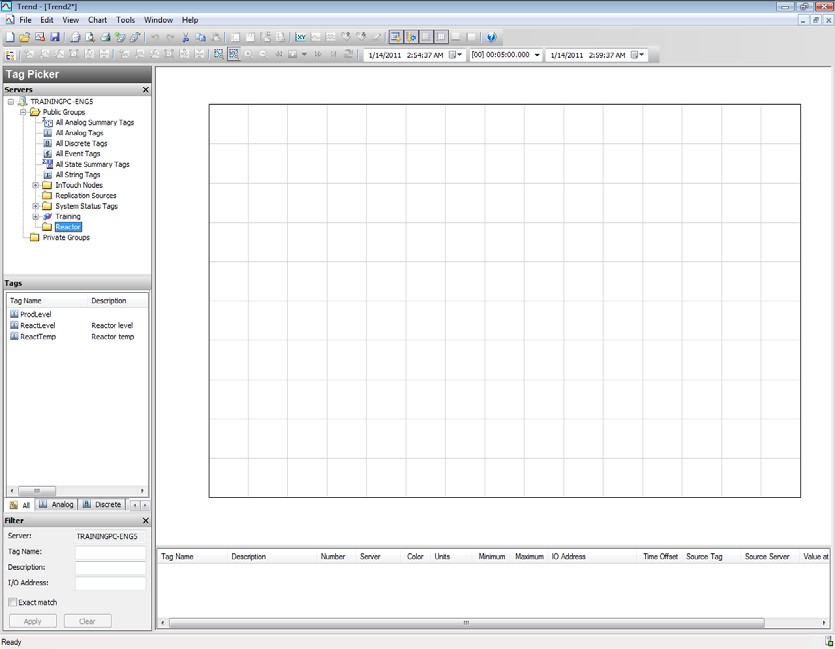
Tag Picker
The Tag Picker control is common to all Wonderware Historian Client applications.
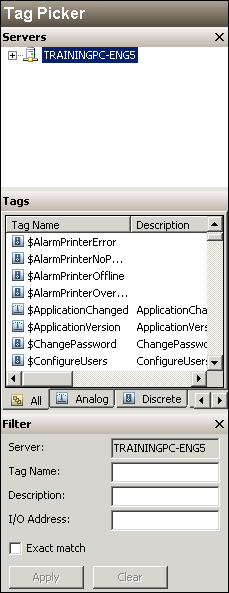
The Tag Picker control helps a user searching for tag names for use in a particular application,
such as Trend, Query, Workbook, or Report.
Depending upon the application and user preferences, Tag Picker may consist of a Servers pane,
Tags pane, and Filter pane.
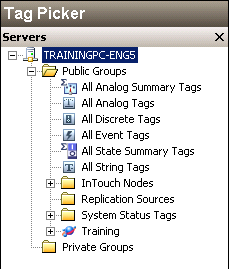
Servers Pane
This pane lists all the Historian Servers that are currently connected.
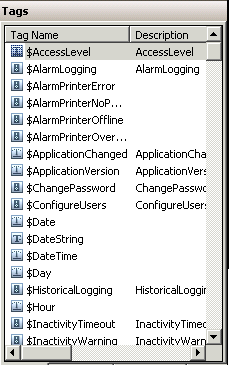
Tags Pane
The Tags pane lists all the tags from the selected folder in the tree folder structure along with any
filter conditions specified in the Filter pane. Tag Name, Description, and I/O Address are
exposed using the scroll bar.
Filter Pane
The Filter pane filters tags using the criteria listed in the pane.
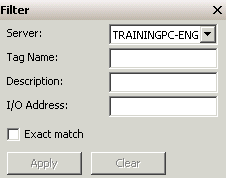
- Tag Name – Enter the tag name search parameters for the query. The percentage character (%) is used as a wildcard character when exact match is checked
- Description – Enter a string for the tag description search parameters for the query. The percentage character (%) is used as a wildcard character when exact match is checked
- I/O Address – Enter the address search parameters for the query. The percentage character (%) is used as a wildcard character when exact match is checked
- Exact match – Check the Exact match check box to limit tags returned to the exact character positions for which you searched. For example, searching for Rea will return all tags that contain the letters Rea, no matter where within the tag name the letters appear. A search of Rea% with the Exact match check box selected will return only tags beginning with Rea
- Apply – Click Apply to execute the query. Tags matching the query parameters are listed in the Tags pane
- Clear – Click Clear to clear the filter criteria chosen. The filter conditions will be removed
Wildcard Characters (Apply Only When Exact Match Is Selected)
Examples
Wildcard Characters (Apply Only When Exact Match Is Selected)
Examples
- InSQL searches for all strings that contain the letters InSQL (SysPerfInSQLIOSCPU)
- InSQL%, Exact match searches for all strings that begin with the letters InSQL (InSQL_ProdLevel)
- %X, Exact match searches for all strings that end with the letter X (HenonX, VectorX)
- _ _ _ _1, Exact match searches for all five-letter tags ending with the number 1 (I2311, R2511)
- [R-S]_ _ _ 1, Exact match searches for all names ending with the number 1 that begin with any single letter from R to S (R2511, Step1)
- [^sys]%, Searches for all tags excluding those starting with sys
Create a Trend
Create a trend by dragging and dropping tags directly onto the trend chart pane.
Time Toolbar
The Time toolbar allows you to select a time range by specifying a start time, end time, and
duration. An error appears next to the start or end time controls if you specify an invalid time
period, for example, an end time before a start time.
Tag List
Use the Tag list to view information for the tags that have been added to the trend chart.
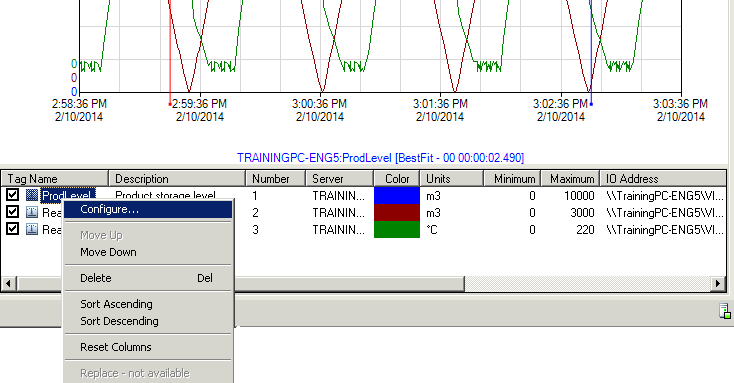
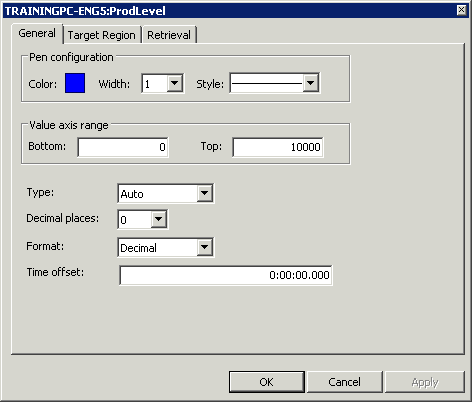
Tag Configuration
1. Right-click a tag name and select Configure

2. Set individual Pen configuration properties and Time offset.
Live Mode
Click Enable or disable live or replay mode to view the tags in live mode. Live data is the data
that is being retrieved continuously in real time.
![]()
Zoom-in and Zoom-out
The Zoom in or Zoom Out buttons on the Scaling toolbar are used to zoom in or out the trend
chart.
![]()
Scale the Tags
Scaling a tag up reduces the current scale range of the vertical axis (Y-axis) by half.
For example, a trend tag has a minimum Y-axis value of 0 and a maximum Y-axis value of 10, for a
total range of 10. When the tag is scaled up, the range for the trend tag becomes 5, where 0 is the
minimum Y-axis value and 5 is the new maximum Y-axis value.
Scaling can be set for a single tag, or for all of the tags in a trend by using the appropriate buttons
on the Scaling toolbar.
Scale a Single Tag
1. Select the tag to scale.
2. On the Scaling toolbar, click the required scale tag button.
![]()
The scale tag buttons for individual tags are (in order):
- Move the current tag up
- Move the current tag down
- Scale the current tag to its original scale
- Auto scale the current tag
- Scale the current tag up
- Scale the current tag down
Scale All Tags
1. Select the scale type that you want to apply to the tag.
![]()
- The scale tag buttons for all tags are (in order):
- Move all tags up
- Move all tags down
- Scale all tags to their original scale
- Auto scale all tags
- Scale all tags up
- Scale all tags down
2. Select the tag to be scaled in the tag list.
3. Select the scale type that you want to apply to the tag.
Automatic Scaling
When automatic scaling is applied on a selected tag or all tags in a trend chart, the scale will be
based on the tag having the smallest minimum Y-axis value and the tag with the largest maximum
Y-axis value. The Y-axis scale for a particular tag is always displayed along the Y-axis. That is,
when scrolling through tags, the Y-axis always displays the scale of the selected tag. Automatic
scaling is done by clicking the Auto scale all tags button.
Trend Options
Right-click inside the trend chart and select Options to configure the trend chart.
Several options can be configured for a trend through various tabs, which are as follows:
- Retrieval
- Color
- Time Zone
- Miscellaneous
- Other
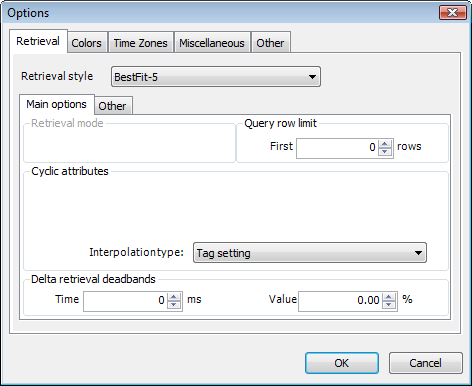
The Retrieval tab sets the retrieval options for the trend.
- Retrieval style: Automatically switches the retrieval modes for trend tags based on the trend duration and tag type.
Main options tab within the Retrieval tab:
- Query row limit – Sets the number of rows to retrieve in the query results
- Cyclic attributes – Sets the Interpolation type to Stairstep, Linear, or to the default
-
Delta retrieval deadbands – Sets the Time and Value % for Delta retrieval
deadbands