Lab 5: Create Screen Group
Step 1: On the Insert tab of the ribbon, in the Graphics group, click Screen Group.

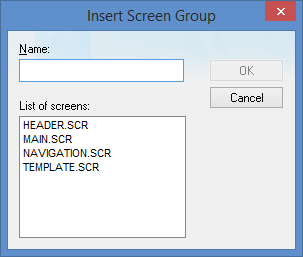
The Insert Screen Group dialog box is opened.

Step 2: In the Name field, enter StartUp.
![]()
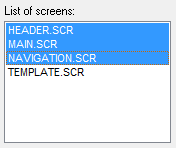
Step 3: In List of screens list box, select the screens HEADER, MAIN, and NAVIGATION screens.

Step 4: Click OK. The Insert Screen Group is closed.
Step 5: On the Graphics tab of the Project Explorer, click the chevron to the left of the Screen Group folder. The Screen Group folder is expanded.

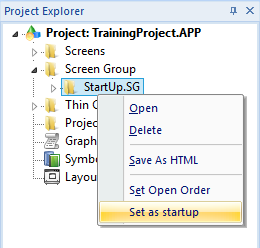
Step 6: On the Graphics tab of the Project Explorer, right-click the StartUp.SG screen group folder and click Set as startup on the shortcut menu.

Step 7: Do the following to verify that you successfully completed this lab:
Step 8: On the Graphics tab of the Project Explorer, click the chevron to the left of the Screens folder. The Screens folder is expanded.
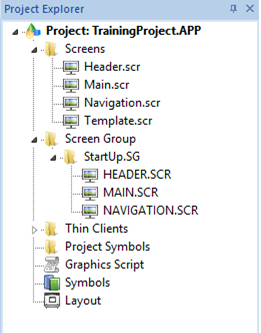
Step 9: On the Graphics tab of the Project Explorer, click the chevron to the left of the Screen Group folder. The Screen Group folder is expanded. Click the chevron to the left of the StartUp.SG folders. The StartUp.SG screen group folder is expanded, Your Project Explorer should look similar to the following:

If your runtime is on a remote machine, then use the Remote Management tools on the Home tab of the Ribbon to download your project to the remote machine. Start the runtime and test. The project runtime client should look similar to the following:

