Lab 16 – Configuring Store-and-Forward
Configure the Platform
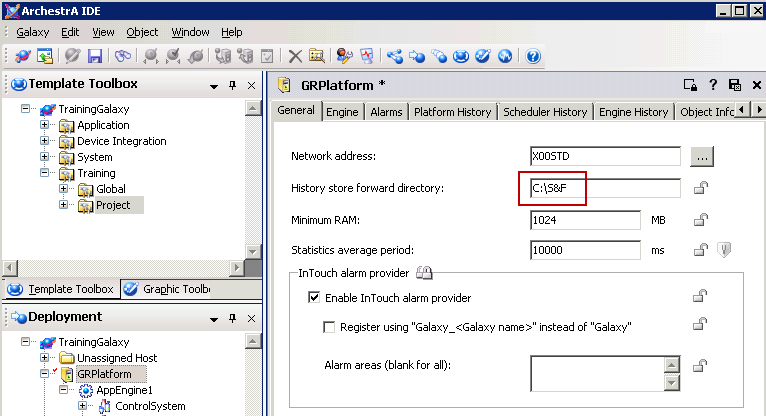
First you will open the Platform configuration and configure a custom Store-and-Forward folder.
Step 1. In the ArchestrA IDE, in the Deployment view, double-click GRPlatform to open its configuration editor.
Step 2. In the History store forward directory field, enter C:\S&F.
Step 3. Save and check in the object.
Step 4. Right-click the GRPlatform instance and select Deploy.
Step 5. In the Deploy dialog box, uncheck the option for Cascade Deploy.
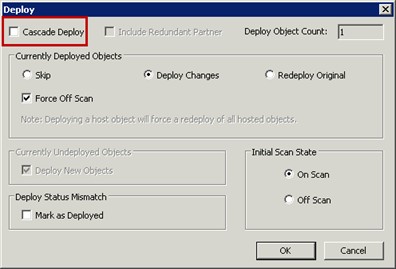
Step 6. Click OK.
Step 7. Open Windows Explorer and verify a new folder has been created with subfolders for both

Monitor Store-and-Forward
Now, you will use Object Viewer to monitor some Store-and-Forward related attributes.
Step 8. In the ArchestrA IDE, right-click AppEngine1 and select View in Object Viewer.
Step 9. In Object Viewer, in the details pane, drag the following attributes to Watch List 1: Engine.Historian.ConnectState
Engine.Historian.InStoreForward
Step 10. Now, in the console tree, select the GRPlatform and in the details pane, drag the following attributes to Watch List 1:
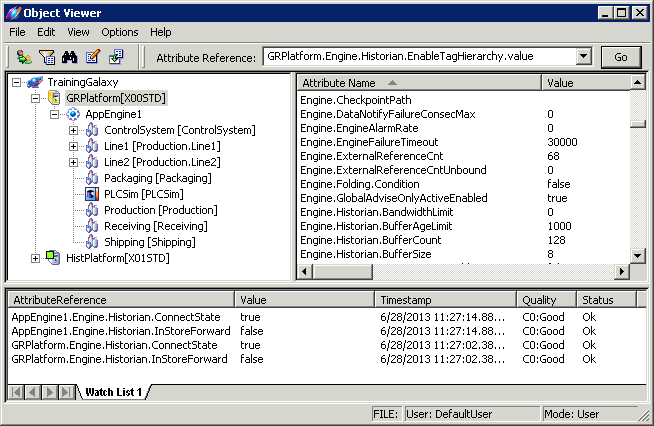
Notice that both objects are connected to Historian and they are not in Store-and-Forward mode.
Step 11. In SQL Server Management Studio, verify that you are connected to your Historian Server and the Runtime database is selected.
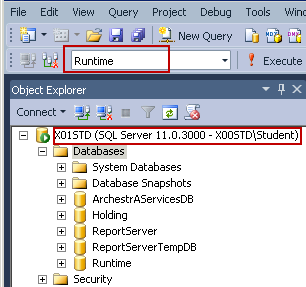
Step 12. In the body of the query, highlight the Example 1 query and click the Execute button (or Press the F5 key).
--Example 1
--Retrieving History data
SELECT DateTime, Value, wwVersion FROMHistory
WHERE  TagName= 'M100.TT.PV'
ANDDateTime > Dateadd(mi, -5, Getdate()) ANDDateTime <= Getdate()
This basic query to the History table returns a set of at least 230 records for the last 5 minutes.
Trigger Store-and-Forward
Now you will create a situation where AppEngine1 will not be able to reach the Tier-1 Historian server, forcing it to go into a Store-and-Forward state. Then you will execute the query again and compare the results.
Step 13. In the System Management Console, expand Historian\Historian Group\[Tier1- Historian Server node name] and right-click Management Console.
Step 14. Select Stop Historian.
The Stop Historian confirmation dialog box opens.
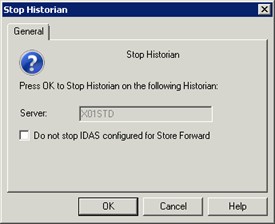
Step 15. Click OK.
Step 16. Go to Object Viewer and verify that now the InStoreForward attributes are true.

Step 17. Go back to SQL Management Studio and run the query again. Within 5 minutes, verify the query returns no results.
Step 18. Go back to the System Management Console, expand Historian\Historian Group\[Tier1- Historian Server node name] and right-click Management Console.
Step 19. Select Start Historian.
The Start Historian confirmation dialog box opens.
Step 20. Click OK and wait a minute or so for all the Historian modules to start properly.
Step 21. In SQL Management Studio, run the query again and verify the data retrieved covers the last five minutes (around 230 records).
If not all the data is available yet, run the query again in a few seconds as the system will start historizing new data, and the packages from Store-and-Forward will take few moments to be processed.