Lab 13.1 – Insert Original Data - Part1
Insert Original Data
In the following steps, you will insert original data for the M100.LT.PV tag during a one minute period.
Step 1. Open Windows Explorer and navigate to: C:\Training.
Step 2. Download Lab 13 - Original.csv and select Open With | Notepad.

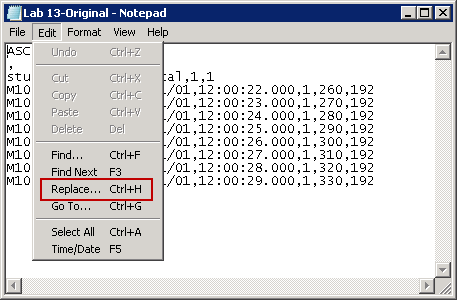
Step 3. In the Notepad menu, click Edit and select Replace.
Insert Original Data
In the following steps, you will insert original data for the M100.LT.PV tag during a one minute period.
Step 1. Open Windows Explorer and navigate to: C:\Training.
Step 2. Download Lab 13 - Original.csv and select Open With | Notepad.
Step 3. In the Notepad menu, click Edit and select Replace.
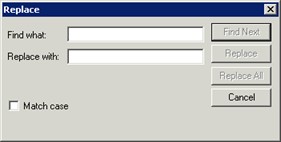
The Replace dialog box appears.
The Replace dialog box appears.
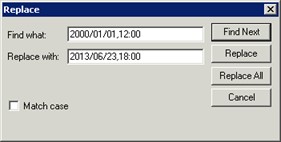
Step 4.In the Find what text field, enter the string 2013/01/01,12:00 exactly as it appears in the text file.
Step 5. In the Replace with text field, enter a time and date from yesterday (or as suggested by your instructor), making sure the new string has exactly the same form as the original.
Step 4.In the Find what text field, enter the string 2013/01/01,12:00 exactly as it appears in the text file.
Step 5. In the Replace with text field, enter a time and date from yesterday (or as suggested by your instructor), making sure the new string has exactly the same form as the original.
Step 6.Click Replace All.
Step 7. Close the Replace dialog box.
Step 8. Save the file and close Notepad.
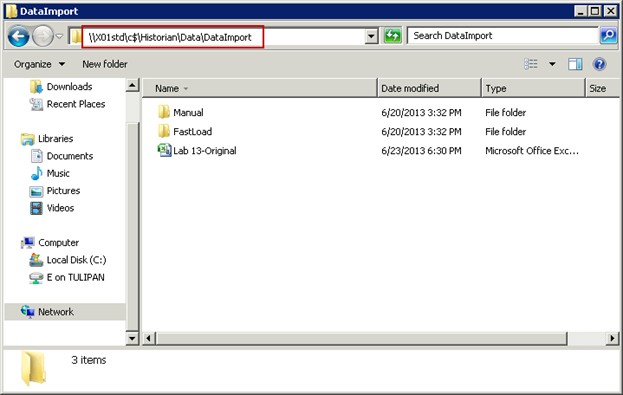
Step 9. Copy the file to the \\[Tier-1 Historian Server node name]\C$\Historian\Data\DataImport
folder.
Step 6.Click Replace All.
Step 7. Close the Replace dialog box.
Step 8. Save the file and close Notepad.
Step 9. Copy the file to the \\[Tier-1 Historian Server node name]\C$\Historian\Data\DataImport
folder.
This folder is scanned periodically by MDAS. If MDAS detects a data file, it will process the file. After a moment the file will disappear.
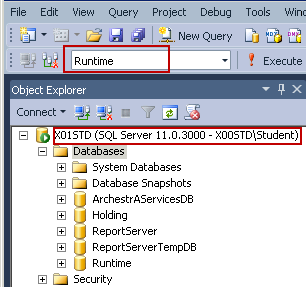
Step 10.Go back to the SQL Server Management Studio and verify that you are connected to your Tier-1 Historian Server and the Runtime database is selected.
This folder is scanned periodically by MDAS. If MDAS detects a data file, it will process the file. After a moment the file will disappear.
Step 10.Go back to the SQL Server Management Studio and verify that you are connected to your Tier-1 Historian Server and the Runtime database is selected.
Step 11. On the File menu, click Open | File. The Open File dialog box appears.
Step 12. Navigate to C:\Training, select C:\Training\Lab 13 - Inserting Data Manually CSV.sql and click Open.
Step 13. Change the date and time string in the query to cover the one minute period where the data was inserted.
Step 14. Select and execute the query.
--After the data points in the CSV file were added in the Historian Server,
--you will run the query to verify the operation was successful. Make sure
--to change the time strings in the query to cover the period where the
--data was inserted.
SELECT DateTime, Value, wwVersion FROMHistory
WHERE TagName= 'M100.LT.PV'
ANDDateTime>='2013-01-01 06:00:00'
ANDDateTime<='2013-01-01 06:01:00'
ANDwwVersion = 'original' UNION
SELECT DateTime, Value, wwVersion FROMHistory
WHERE TagName= 'M100.LT.PV'
ANDDateTime>='2013-01-01 06:00:00'
ANDDateTime<='2013-01-01 06:01:00'
ANDwwVersion = 'latest'
--For the inserted date and time, is there an Original and Latest version?
Notice that both Original and Latest versions have the same values.
Last modified: Saturday, 22 June 2019, 9:07 AM