Lab 10.2 – Add Tags to the Tier-2 Replication Server
Add Tags to the Tier-2 Replication Server
Now that the Tier-2 Historian Server has been added as a replication server, you will select some of your historized attributes to have simple replication in the Tier-2.
Step 11. Expand the Replication Server you just added.
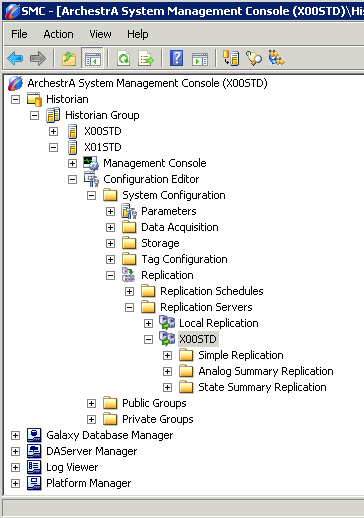
Step 12. Select Simple Replication, right-click and select Add Multiple Tags.
The Add Multiple Tags - Step 1 of 2 - Select tags to replicate dialog box appears.
Step 13. Configure the following:
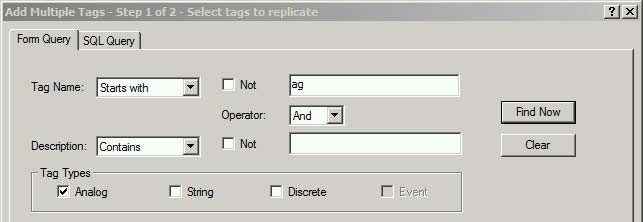
Step 14. Click Find Now.
Step 15. From the Found Tags list, select the following tag names and move them to the Target Tags
- Agitator_001.Speed.PV
- Agitator_002.Speed.PV
- Agitator_001.Temp.PV
- Agitator_002.Temp.PV
Step 16. Click OK.
The Add Multiple Tags - Step 2 of 2 - Create replicated tags dialog box appears.
Step 17. Click Apply and verify that all tags have a Status of Passed.
Step 18. Click Close.
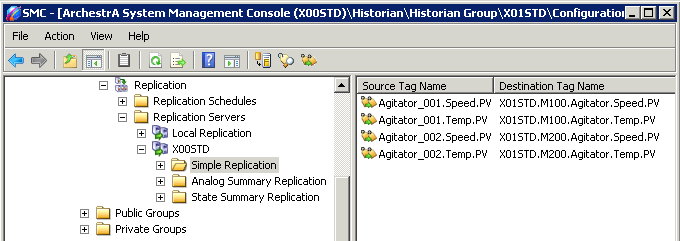
In the right panel, you can see the simple replication tags just created.
There is an alternative way to configure tags for replication.
Step 19. In the SMC, expand Configuration Editor\System Configuration\Tag Configuration and select Analog Tags.
Step 20. Right-click M100.LT.PV and select Replicate to.
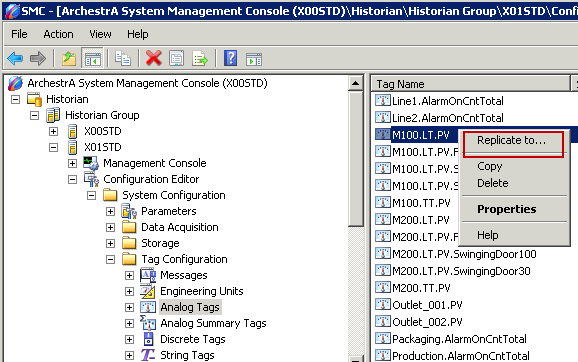
The Replicate to dialog box appears.
Step 21. Configure the following information:
Replication ServerName : [Tier-2 Historian Server node name]
Replication Type : Simple Replication
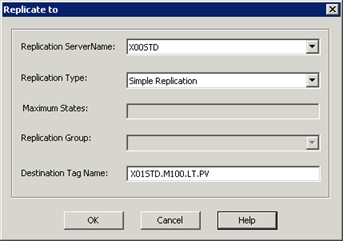
Step 22. Click OK.
The Operation result dialog box appears.
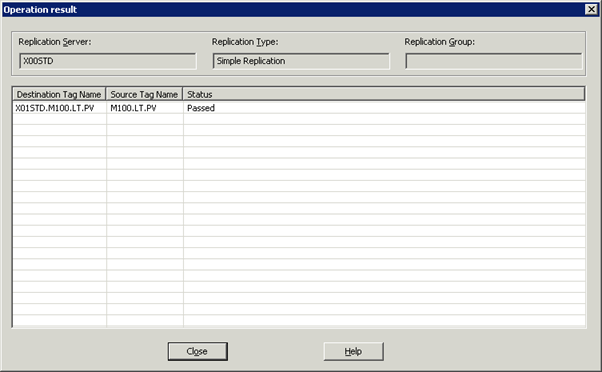
Step 23. Click Close.
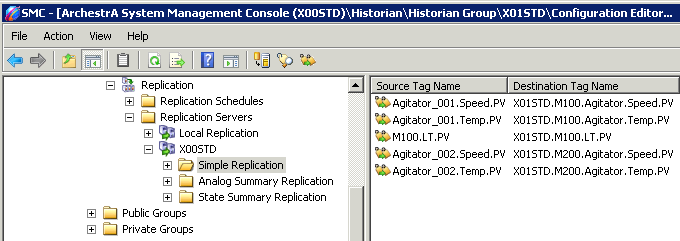
Step 24. Expand Configuration Editor\System Configuration\Replication\Replication Servers\[Tier-2 Historian Server node name], select Simple Replication and verify the new replication tag for M100.LT.PV has been created.
All the changes done so far have been saved, but the actual replication has not yet started.
Step 25. Right-click Configuration Editor\System Configuration\Replication and select Commit Pending Changes.
The Commit Pending Changes - Confirmation dialog box appears.
Step 26. Click Commit.
The confirmation dialog box appears.
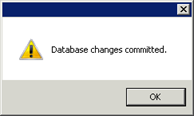
Step 27. Click OK.
Step 28. Expand Management Console\Replication and verify that both replication servers have a Status of Replicating.

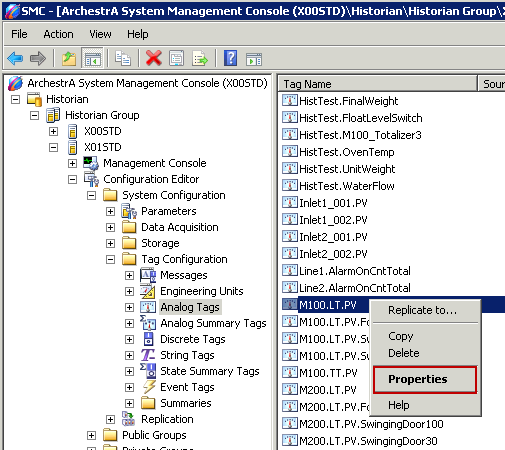
Step 29. Expand Configuration Editor\System Configuration\Tag Configuration\Analog Tags,
select M100.LT.PV, right-click and select Properties.
Step 30. In the M100.LT.PV Properties dialog box, select the Replication tab.
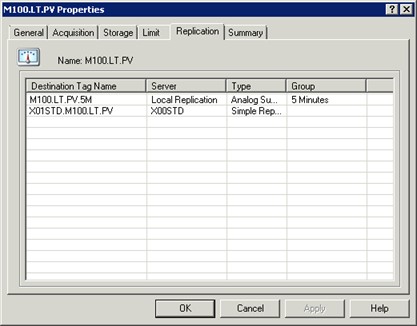
Here you can see the destination tag information, replication server node name, and type of replication where this tag is used.
Step 31. Click OK.
Step 32. In the SMC, register the Tier-2 Historian Server.
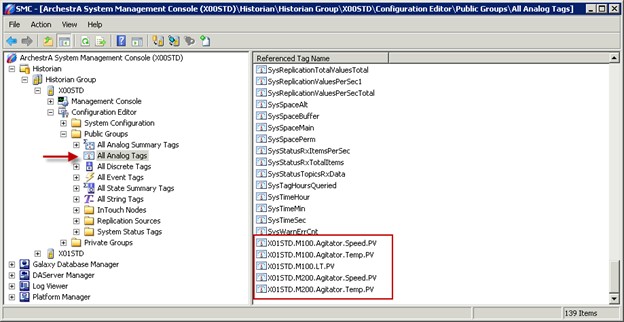
Step 33. Expand Historian\Historian Group\ [Tier-2 Historian Server node name]\Configuration Editor\Public Groups, select All Analog Tags and verify the new replication tags that were created on the Tier-2 Historian Server.
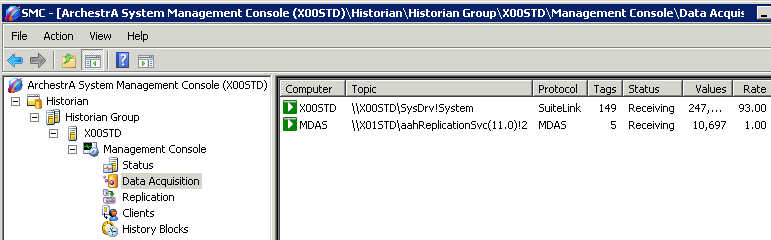
Step 34. Expand Historian\Historian Group\ [Tier-2 Historian Server node name]\Management Console, select Data Acquisition and verify there are connections for each Tier-1 Historian Server that is replicating tags to this server.
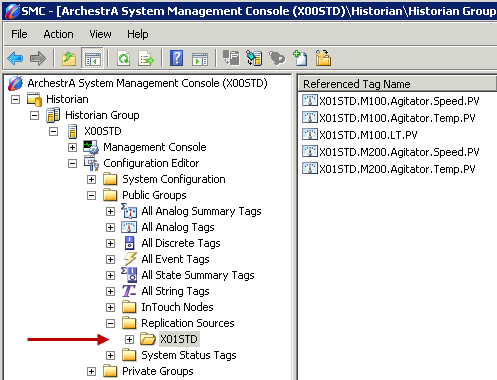
Step 35. Expand Historian\Historian Group\ [Tier-2 Historian Server node name]\Configuration Editor\Public Groups\ Replication Sources, and verify there is one folder for each Tier 1 Historian Server replicating remotely.
Last modified: Friday, 21 June 2019, 3:15 PM